Hydroponic Tomatoes for Beginners can turn your kitchen into a mini tomato paradise. Imagine reaching over to a lush green vine and picking a warm, sun-ripened tomato that you grew yourself, even in the middle of winter. No soil, no pests, and no back-breaking garden work. Hydroponics makes this dream possible, giving you faster growth and higher yields than traditional gardening. Whether you are a hobbyist looking for a fun home project or a grower aiming for commercial success, this guide will show you exactly how to master the art of hydroponic tomatoes.
Best Hydroponic Systems for Tomatoes for Beginners
Growing juicy, flavorful tomatoes without soil starts with choosing the right hydroponic system. Tomatoes are heavy feeders with extensive root systems. Your setup needs to provide consistent oxygen, water, and nutrients to support their growth. Here is a detailed look at the three most popular hydroponic systems for tomatoes.
Deep Water Culture (DWC) for Hydroponic Tomatoes
If you’re just getting started with hydroponics, DWC is honestly the easiest way in. In this setup, your tomato roots sit directly in a nutrient-rich solution that’s constantly bubbled with an air pump and air stones, so the plants basically “relax” while they grow. The large water volume keeps nutrients and temperature stable, which means you don’t have to stress over every little adjustment.
For beginners or anyone running a small indoor garden, DWC is incredibly forgiving. You get fast growth, steady yields, and minimal daily fuss. It’s a great way to see real results quickly and build confidence before trying more advanced systems.
Drip System Setup for Hydroponic Tomatoes
If you want to take your hydroponic garden to the next level, a drip system is a solid choice. In this setup, nutrient solution flows through tubes and drips right at the base of each plant. Your tomatoes get exactly what they need, exactly when they need it. Many growers add a medium like coco coir or perlite. This supports the plants and keeps roots stable and healthy.
Drip systems shine because of the level of control they provide. You can adjust water and nutrient delivery for each plant. This is perfect for larger indoor gardens or small commercial setups. Compared to DWC, drip systems reduce overwatering and root problems. They give your tomatoes the best chance to thrive without constant monitoring.
Nutrient Film Technique (NFT) for Hydroponic Tomatoes
NFT systems are a great choice if you want to save space and use water efficiently. In this setup, a thin film of nutrient solution flows continuously over the roots along a sloped channel. This keeps them constantly fed. NFT is ideal for vertical gardens or tight indoor spaces where every inch counts.
Tomato roots grow vigorously and can easily clog narrow channels. You will need to watch flow rates closely and perform regular maintenance. NFT offers a lot of control and efficiency, but it works best for growers with some experience. It lets you fine-tune every drop of nutrient your plants receive.
Comparison Summary of Hydroponic Tomato Systems
If you’re just starting out, DWC is the easiest way to get your feet wet. It’s forgiving, low-maintenance, and lets you focus on learning the basics without stressing over tiny daily changes. Drip systems are perfect if you want to step things up a notch giving you precise control and the flexibility to grow more plants or run a bigger indoor setup. NFT systems are super efficient and space-saving, but tomato roots can be a bit tricky, so they’re really best for growers who already have some experience under their belt.
A little pro tip from the trenches: whatever system you pick, keeping a close eye on nutrient levels, pH, and oxygenation will make a huge difference. Healthy roots mean healthy plants, and healthy plants mean juicy, flavorful tomatoes that actually make all your effort worth it.
Step-by-Step Setup Guide for Hydroponic Tomatoes
Getting your hydroponic tomato garden started requires a mix of the right tomato varieties, proper system setup, and careful environmental control. By following these steps, you can ensure a healthy crop and a bountiful harvest, even indoors.
1. Choose the Right Tomato Variety for Beginners
Selecting the right tomato variety is the foundation of your hydroponic success. You want plants that thrive in water and fit the space you have available, whether it’s a small indoor tent or a larger vertical system. Choosing the right type early on can save a lot of time and frustration later.
Cherry Tomatoes (The Easiest Choice):Varieties like Sungold or Sweet 115 are ideal for beginners. They are highly resilient and can tolerate minor fluctuations in pH or nutrient levels. Cherry tomatoes grow quickly, producing clusters of small, sweet fruit throughout the season, giving fast rewards and building confidence for first-time hydroponic growers.
Roma Tomatoes (The Reliable Producer):If you prefer tomatoes for cooking, sauces, or drying, Roma varieties are an excellent choice. As determinate plants, they grow to a fixed height and produce fruit all at once, making them easier to manage indoors. Their thicker flesh is perfect for culinary use and adapts well to the precise feeding and pruning schedules required in hydroponic systems.
2. Set Up Your Hydroponic Tomato System
Once you have chosen your seeds, the next step is creating the right environment for your tomatoes. These plants are heavy feeders with extensive root systems, so a well-prepared setup is essential for strong growth and healthy fruit production.
Proper aeration is key. Use high-quality air stones to oxygenate the nutrient solution, which prevents root stress and encourages faster growth. Maintaining stable water levels is equally important, as large fluctuations can shock the roots and slow development.
Keeping your nutrient reservoirs light-proof is critical. Even small amounts of light can trigger algae growth, which competes with your tomatoes for nutrients. As for system choice, Deep Water Culture (DWC) is ideal for beginners due to its forgiving nature, while drip systems offer precise control and scalability for larger indoor gardens.
3. Prepare Nutrient Solution for Hydroponic Tomatoes
Hydroponic tomatoes are “heavy feeders” and need consistent nutrient levels to thrive. Monitoring your solution daily with a digital meter helps ensure your plants get exactly what they need for vigorous growth. Maintaining a slightly acidic pH range of 5.5 to 6.5 is essential for proper nutrient uptake.
Electrical Conductivity (EC) should be kept between 2.0 and 3.5, with higher levels during flowering and fruiting stages to support fruit development. Regularly checking these parameters prevents deficiencies, keeps plants healthy, and ensures your tomatoes reach their full size and flavor potential.
4. Lighting Requirements for Hydroponic Tomatoes
Tomatoes are sun-loving plants that need intense, high-quality light to produce the sugars that make fruit sweet and flavorful. Indoors, providing 12 to 16 hours of consistent light is essential. Full-spectrum LED lights are ideal because blue wavelengths keep plants compact and prevent legginess, while red wavelengths trigger flowering and fruit development, supporting every stage from seedlings to mature plants.
Advanced setups that include UV and IR light offer extra benefits. UV stimulates lycopene and antioxidant production, giving tomatoes a richer red color and more complex flavor. IR enhances photosynthesis and strengthens plant structure, helping fruits grow larger and healthier. Without sufficient light intensity or spectrum, tomatoes tend to be small, pale, and less sweet.
5. Pollination Tips for Hydroponic Tomatoes
One step often overlooked by indoor growers is pollination. Without wind or bees, tomato flowers need a little help to set fruit. You can gently shake the main stem or individual flower clusters once a day during the flowering stage to release pollen effectively.
Using a small oscillating fan is another great option. It helps spread pollen, strengthens stems, and improves airflow to lower the risk of mold or mildew. For practical tips, see our hydroponic pollination guide.
Combining proper lighting, nutrient management, and assisted pollination ensures healthy flowers, maximizes fruit set, and boosts overall yield in your hydroponic tomato garden.
Hydroponic Tomato Nutrients Guide for Beginners
One of the most important secrets to a thriving hydroponic tomato garden is really understanding what your plants “eat.” Unlike soil, where nutrients are naturally buffered, hydroponic tomatoes rely entirely on the solution you provide. Getting this balance right can be the difference between a few small, underwhelming fruits and a steady harvest of big, juicy, flavorful tomatoes.
Tomatoes are hungry plants, and their nutrient needs shift as they move from leafy growth to flowering and fruiting. Paying attention to these changes and adjusting your solution accordingly will help your plants stay strong, flower consistently, and produce the kind of fruit that makes all your effort worthwhile. At a minimum, your solution should cover the three main elements that tomatoes need most.
Nitrogen (N) for Hydroponic Tomatoes
Think of nitrogen as the fuel that keeps your tomato plants growing strong and healthy. It encourages lush green leaves and sturdy stems, which are essential for photosynthesis and overall plant vigor. If you start noticing your plants looking pale, slow-growing, or a bit weak, it could be a sign that they need more nitrogen. On the other hand, adding too much nitrogen can make your plants focus on leaf growth at the expense of flowers and fruit. In hydroponics, it’s important to monitor nitrogen levels carefully so your tomatoes grow balanced, healthy, and ready to produce fruit throughout the season.
Phosphorus (P) for Hydroponic Tomatoes
Phosphorus is all about supporting roots and flowers. Strong roots absorb water and nutrients efficiently, which sets the foundation for healthy plant growth. Flowers with enough phosphorus are more likely to develop into actual fruit, so this nutrient is especially important during early growth and the start of flowering. Make sure your solution has enough phosphorus to help roots establish themselves quickly and keep the levels steady as your plants start producing flowers. Healthy roots and flowers mean your tomatoes have the best chance to grow big, flavorful, and consistent.
Potassium (K) for Hydroponic Tomatoes
Potassium is what really makes your fruit shine. It regulates water within the plant, strengthens stems, and directly impacts the size, color, and sweetness of your tomatoes. Many growers notice that slightly increasing potassium during flowering can lead to noticeably bigger and tastier fruit. It’s not just about size; potassium also helps your plants stay strong and resilient, reducing the risk of stress from heat, water changes, or disease. Keeping potassium at the right level, along with balanced nitrogen and phosphorus, is key to producing juicy, flavorful tomatoes that look as good as they taste.
A little trick many tomato growers use is to give your plants a bit more potassium when they start flowering while keeping nitrogen and phosphorus in check. Watching your EC levels and adjusting nutrients as the plants grow makes a big difference. Your tomatoes will stay healthy, bloom better, and produce juicier, tastier fruits.
Common Problems and Solutions for Hydroponic Tomatoes
| Problem | Cause | Solution |
|---|---|---|
| Yellow Leaves | Nutrient deficiency or pH imbalance | Calibrate your pH meter, adjust water to around 6.0, and check EC levels to ensure nutrients are sufficient |
| No Fruiting | Poor indoor pollination or lack of potassium | Improve airflow with a small fan, gently shake flowers, and switch to a bloom-focused nutrient formula |
| Stunted Growth | Low light, inadequate nutrients, or root stress | Increase light intensity to 12–16 hours of full-spectrum light, adjust nutrient solution, ensure roots are not overcrowded |
| Blossom Drop | Sudden temperature changes or inconsistent watering | Maintain stable day/night temperatures, keep nutrient solution levels consistent, and ensure proper humidity |
| Root Rot | Overwatering or poor aeration | Improve aeration with quality air stones, lower water temperature if needed, and avoid stagnant water in the reservoir |
Hydroponic vs Soil-Grown Tomatoes for Beginners
Many gardeners wonder whether hydroponic tomatoes can match soil-grown ones. Hydroponic tomatoes grow faster and yield more per square foot because their roots have constant access to water, oxygen, and nutrients. This precise control allows you to optimize growth, fruit size, and even flavor by adjusting the nutrient balance and pH according to each growth stage.
Hydroponics also saves water and space, making it ideal for indoor or urban gardens where soil space is limited. Soil-grown tomatoes may have a more “traditional” taste due to natural soil microbes, but they are more affected by weather, pests, and uneven nutrient availability. With hydroponics, you get consistent, high-quality tomatoes year-round with less risk of stress or disease.
Overall, hydroponic systems let you grow more, faster, and in a controlled environment, while soil-grown tomatoes may appeal to those who prefer the classic outdoor gardening experience.
Yield and Growth Timeline for Hydroponic Tomatoes
Managing your expectations is easier when you know the typical growth cycle of a water-grown tomato. While variables like light intensity and nutrient concentration play a massive role, here is the general roadmap from seed to salad bowl.
The Growth Milestone Schedule for Hydroponic Tomatoes
Germination, which usually takes about five to ten days, is your baby stage. Whether you are starting seeds in rockwool cubes or coco coir, the key is to keep them warm and humid. During this time, I like to check daily for the first signs of true leaves. Once those little green leaves appear, it is your cue that the seedlings are ready to move into the main hydroponic system, where they can really start growing strong.
The vegetative stage lasts around three to five weeks and is when your tomatoes really start to stretch and fill out. This is the period of explosive growth. The roots dig in, stems thicken, and leaves fan out, soaking up light and nutrients. If you watch closely, you can see noticeable changes week by week, which is always exciting, and it feels like your plants are almost “learning” how to grow.
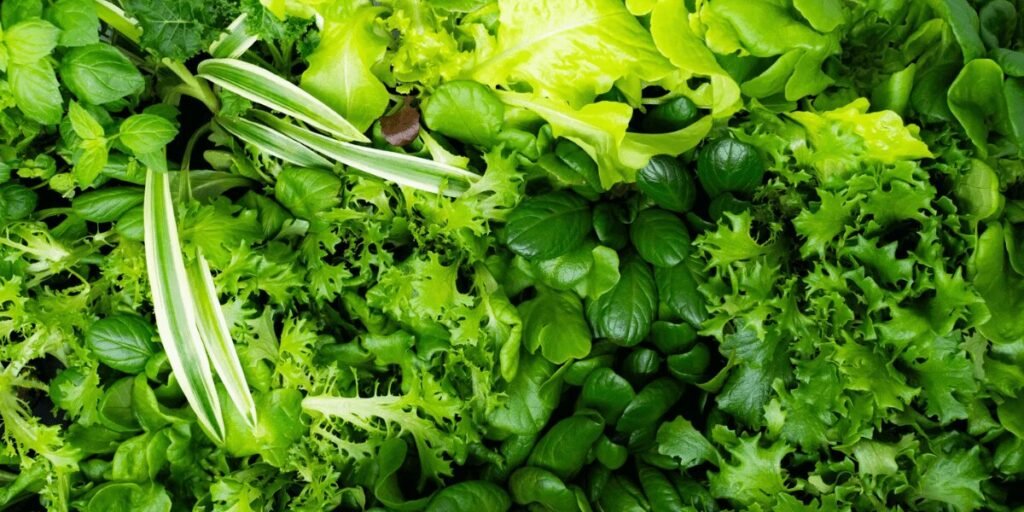
Flowering and fruiting usually take place over sixty to ninety days, depending on variety and conditions. This is the stage everyone waits for. Tiny yellow blossoms appear first, and then you start seeing those small green “pearls” that will gradually swell into the ripe, juicy tomatoes you have been waiting for. Patience is key here, but it is incredibly rewarding to watch your plants go from a leafy jungle to a fruit-laden garden. For guidance on growing other water-loving plants, see our hydroponic leafy greens guide.
Realistic Yield Potential for Hydroponic Tomatoes
A question I hear all the time from growers is how much they can actually expect to harvest. When your hydroponic system is dialed in with stable pH and consistent lighting, a healthy tomato plant can easily produce between 4 and 10 kilograms of ripe, flavorful fruit over the season.
One of the advantages of soil-free growing is that your plants don’t have to compete for nutrients. Every bit of energy they take in goes straight into producing fruit. In my experience, this often means yields that are 25 to 50 percent higher than what you would get from the same plant in a traditional soil garden. Seeing a single plant loaded with plump, juicy tomatoes never gets old, and it really shows how efficient hydroponics can be.
FAQ for Hydroponic Tomatoes for Beginners
If your hydroponic tomatoes aren’t producing fruit, the most common causes are poor pollination or insufficient potassium. Indoor plants rely on airflow or manual vibration to spread pollen, so gently shaking the flowers or using a small oscillating fan can help. Also, check your nutrient solution. During flowering, increasing potassium can boost fruit set and improve size and flavor.
Yellow leaves usually indicate a nutrient deficiency or a pH imbalance. Nitrogen deficiency is the most common cause for older leaves turning yellow, while pH that is too high or too low, outside the range of 5.5 to 6.5, can prevent nutrient uptake. Adjust the pH and make sure your EC levels are within 2.0 to 3.5 depending on the growth stage to keep your plants healthy.
Slow or stunted growth can be caused by weak lighting, unstable nutrient levels, or poor oxygenation in the water. Hydroponic tomatoes need 12 to 16 hours of full-spectrum light daily and a well-oxygenated nutrient solution. Make sure your DWC, drip, or NFT system provides proper aeration and stable water levels to promote vigorous growth.
Flavor depends on variety, nutrients, and growing conditions. Properly managed hydroponic tomatoes can taste just as good or even sweeter than soil-grown tomatoes because you have precise control over nutrients, water, and light. Cherry varieties like Sungold often produce very sweet and flavorful fruit in hydroponic setups.
For best results, replace your nutrient solution every one to two weeks. Regular changes prevent nutrient imbalances, reduce the risk of algae or pathogens, and ensure your hydroponic tomatoes have a consistent supply of all essential elements including nitrogen, phosphorus, and potassium.
Conclusion on Growing Hydroponic Tomatoes
Growing tomatoes hydroponically is one of the most satisfying ways to enjoy fresh, high-quality produce, whether at home or on a larger scale. You get to step beyond the limits of traditional soil gardening and have full control over your plants, from nutrients to light and water. Once you get the hang of balancing these factors, you can enjoy vibrant, sun-ripened tomatoes throughout the year, right from your own indoor garden.
If you’re just getting started, don’t worry about getting everything perfect immediately. Starting with a simple system like DWC is a great way to learn the ropes. Focus on keeping nutrient levels stable and providing consistent lighting. When you see your first clusters of fruit ripen, it’s an incredibly rewarding feeling and a real proof of how efficient and fun hydroponic gardening can be.
Ready to Start Your Indoor Hydroponic Tomato Garden
Ready to start your hydroponic tomato garden? You don’t need a huge setup to get started, even a small Deep Water Culture system on your windowsill can give you your first taste of growing juicy, flavorful tomatoes at home. Watching your seedlings develop into strong, leafy plants and eventually produce vibrant fruit is an incredibly rewarding experience. The key is to stay consistent with your nutrient solution, provide enough light, and enjoy the process of seeing your plants thrive every day.
At Greenfuturehydro, we make hydroponic tomato growing simple and accessible. Our beginner-friendly systems are designed to help you maintain stable water and nutrient levels while giving your plants the perfect environment to flourish. Whether you want to experiment with a few pots indoors or plan a larger indoor garden, our modular setups make it easy to scale and adapt to your space. There’s something truly magical about picking your own ripe tomatoes straight from a system you built and nurtured yourself.
Want personalized advice for your hydroponic tomato garden?
Follow @Greenfuturehydro on Instagram for tips, real grow stories, and step-by-step guides to help your tomatoes thrive
Grow your own fresh, juicy, sun-ripened tomatoes all year round with a little care and the right hydroponic setup