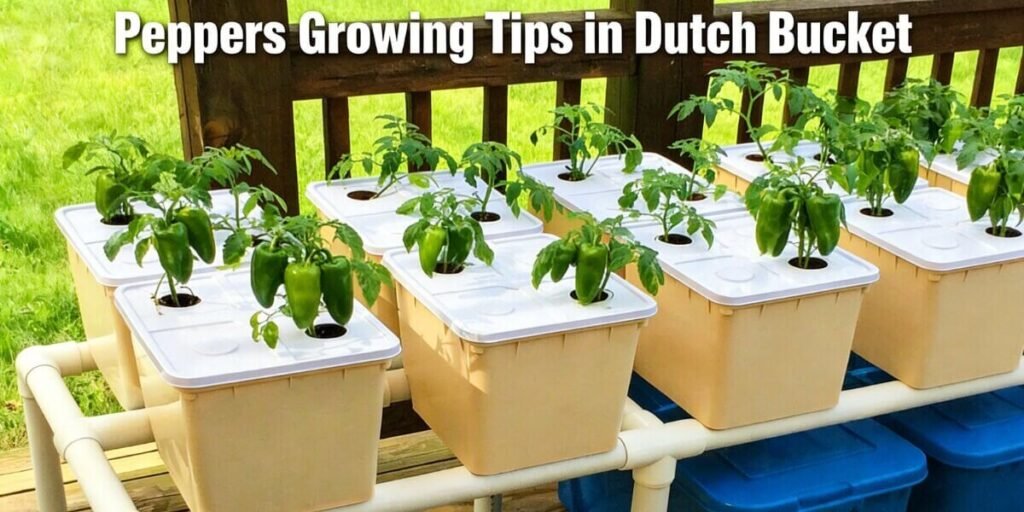
Want to grow high-yield, flavorful peppers at home or in a greenhouse using a Dutch Bucket system? These pepper growing tips will help you create the ideal root environment for strong plants and consistent production. The Dutch Bucket system, also known as the Bato Bucket, is one of the most reliable hydroponic methods for fruiting crops because it provides excellent drainage, steady moisture control, and strong root oxygenation.
Compared with soil containers or other hydroponic setups, Dutch Buckets support better root development, improved fruit set, larger peppers, and enhanced flavor. This system is especially popular among growers who want stable growth and higher yields.
In this guide, you will learn practical techniques for setting up the system, choosing growing media, transplanting seedlings, managing nutrients, scheduling irrigation, controlling the environment, and handling pollination and pruning. These methods are suitable for both home growers and commercial producers aiming for healthier plants and more productive harvests.
Why Chili Pepper Performs Best in Dutch Bucket Systems for Fruiting Crops
I have been growing peppers for years and have tried everything from soil pots to several hydroponic systems. Over time, Dutch Buckets, also known as Bato Buckets, turned out to be the most reliable setup for fruiting crops. What made the biggest difference for me was root control. Each bucket allows better management of water and nutrients, so roots do not stay in overly wet media, which is a common problem with peppers.
Peppers are surprisingly sensitive below the surface. They need oxygen just as much as moisture, and this is where Dutch Buckets really shine. The drainage is consistent, the root zone stays well aerated, and even large fruiting varieties develop strong root systems that can support heavy production. Compared to other systems I have used, plant growth feels steadier and fruit set is more dependable.
Another reason I stick with this system is how manageable it is in daily practice. If one plant shows stress or early disease signs, that bucket can be isolated without disturbing the rest of the crop. Over time, this kind of control reduces risk and makes the whole growing process less stressful. For me, Dutch Buckets are not just another hydroponic method, but a system I trust season after season for stable yields and consistent pepper quality.
Understanding Root Physiology of Capsicum Plants in Semi-Arid Growing Conditions
Peppers originate from semi arid regions where rainfall is irregular and soil naturally dries between showers. Their roots adapted to these conditions, which means they require oxygen as much as water and do not tolerate constant saturation. After years of growing peppers, I found that success largely comes down to recreating this balance. Systems like Dutch Buckets, with fast drainage and good aeration, make it much easier to keep the root zone moist but never waterlogged. When roots stay healthy and active, fruit set, fruit size, and overall plant vigor all improve noticeably.
This is exactly why overwatering becomes one of the most common and damaging mistakes. Many growers assume more water means faster growth, but with peppers the opposite often happens. When roots remain wet for too long, oxygen levels drop and the plant shifts energy toward survival and leaf growth rather than fruit production. I always allow the medium to go through a gentle dry back between irrigation cycles. That short air exposure stimulates root respiration and strengthens the entire plant.
This small change in watering rhythm consistently leads to stronger root systems, better flowering, and larger, more flavorful fruits. Giving pepper roots air, not just water, is one of the key differences between average results and high yielding plants.
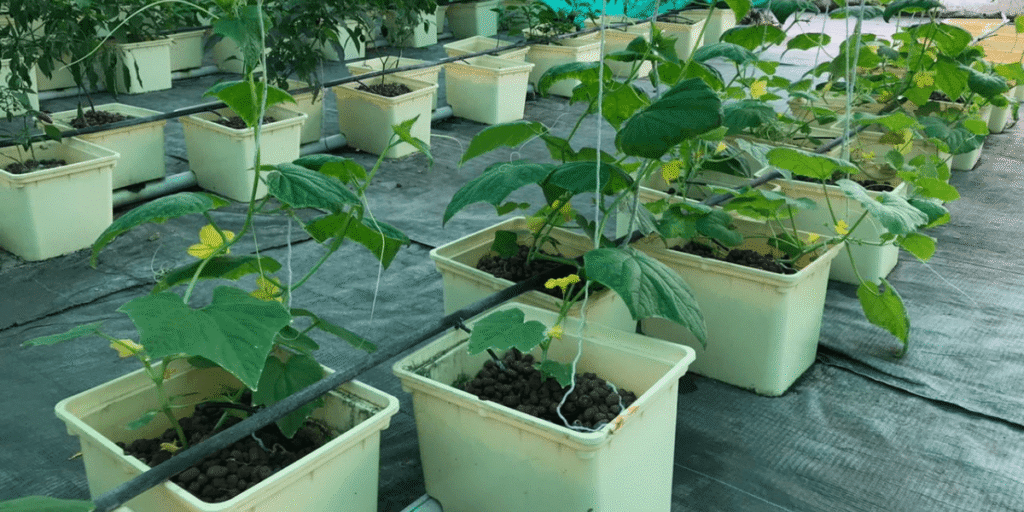
Tip 1: How to Properly Set Up a Dutch Bucket System for Fruiting Vegetables
1. Bucket Size Matters More Than Most People Think
When I first tried smaller containers, the plants looked fine early on, but once fruiting started the problems showed up fast. The media dried too quickly, EC kept fluctuating, and plants stressed easily on hot days. After switching to 3–5 gallon buckets, everything became more stable. Moisture levels stayed more consistent, roots had enough space to expand, and the plants handled temperature changes much better. Since then, this size range has been my standard for peppers.
2. Drainage Is What Actually Protects the Roots
One early mistake was assuming more water meant happier plants. Without proper side drainage, the lower media stayed too wet and roots slowly turned unhealthy. After installing side outlets a little above the bucket base, the difference was clear. The medium stayed moist but never waterlogged, and roots remained white and active. Good drainage ended up being more important than how much water I supplied.
3. The Growing Medium Changes How Roots Behave
I tested different substrates over time, and the pattern was obvious. Media that held too much water made the roots sluggish. Perlite gave faster root growth and better aeration, while clay pebbles worked well for long cycles because they stayed stable and drained quickly. Both helped maintain air space around roots, which peppers really depend on during fruiting.
4. Irrigation Timing Works Better Than Just Increasing Water
At first, I tried fewer but longer watering cycles. The plants did not respond well. Growth slowed and roots lacked vigor. When irrigation was divided into short, frequent pulses, root health improved and nutrient uptake became more consistent. It turned out that keeping oxygen in the root zone mattered more than simply delivering more solution.
5. Spacing Affects Fruit Size More Than Expected
Crowded plants always looked leafy but never produced the fruit size I wanted. Once I increased spacing, airflow improved and light reached deeper into the canopy. Fruit size increased and disease issues dropped noticeably. Giving each plant enough space changed both yield quality and plant health.
6. Support Systems Prevent Hidden Stress
Before using proper support, heavy fruit often pulled branches down, sometimes even disturbing the root zone. After adding stakes and trellis lines, plants stayed upright, light distribution improved, and airflow through the canopy became better. It also reduced stem damage and kept production more consistent during peak fruiting.
Tip 2: Best Transplanting Practices for Hydroponic Chili Seedlings
1. Wait for the Roots to Say “I’m Ready!”
Whenever I move chili seedlings to a new medium, I always wait until I see little white roots peeking out of the starter plug. This tells me the roots are active and ready to explore their new home. Moving them too early usually slows growth because tiny roots can’t take up enough water and nutrients yet. Waiting for the roots to stretch out also helps the seedlings bounce back faster from transplant shock.
2. Make the New Home Cozy for Your Seedlings
A day or two before transplanting, I give the growing medium a good gentle soak, just enough to make it evenly damp but still airy. This way, when the seedlings go in, their roots immediately find water and nutrients, avoiding dry pockets. It’s a small step, but it really helps them settle in comfortably.
3. Start With a Gentle Welcome, Not a Shock
Freshly transplanted roots are delicate and highly sensitive to high EC levels. Start with a mild nutrient solution during the first few days to avoid osmotic stress or root burn. A gentle feeding approach allows roots to adapt and expand into the new medium. Nutrient strength can then be gradually increased once plants show active new growth.
4. Watch Closely and Step In When Needed
The first 3–5 days after transplanting are critical. Mild temporary wilting can happen as roots adjust, but prolonged drooping, leaf curling, or dull leaf color may indicate root damage, overwatering, poor drainage, or environmental stress such as strong light or heat. Quick adjustments to irrigation, light intensity, or airflow can prevent growth delays.
Tip 3: Nutrient Management Strategies for Chili Growth Stages
1. Feed Nitrogen to Build a Lush Green Canopy
During the vegetative stage, peppers are busy growing leaves and stems, so they love a little extra nitrogen. Think of it as giving them the energy to stretch and build a strong, leafy canopy. Healthy green leaves mean more photosynthesis, which lays the groundwork for beautiful flowers and plump fruits later. Just don’t overdo it, too much nitrogen can make them all leaves and no flowers.
2. Power Up Phosphorus and Potassium for Blossoms and Fruits
Once flowers start appearing, it’s time to switch gears. Phosphorus fuels flower and root development, while potassium helps fruits grow big, flavorful, and resilient. Boosting these nutrients at the right time not only improves fruit quality but also helps the plant handle stress such as heat or irregular watering. Timing is key, your peppers need the right support exactly when they start fruiting.
3. Maintain Proper pH Range for Nutrient Uptake Efficiency
Even if your nutrient solution has everything your peppers need, they won’t absorb it properly if the pH is off. A range of 5.8 to 6.5 is ideal. Outside that window, important elements like calcium, magnesium, and phosphorus become tricky for roots to take up. Checking pH regularly is like making sure your seedlings can actually “eat” what you’re giving them.
4. Gradually Tune Nutrient Strength as They Grow
EC, or nutrient concentration, should grow with your plants. Young seedlings prefer a gentle diet, while mature, fruiting peppers need a stronger mix. Increasing EC gradually prevents nutrient shock and keeps growth steady, which helps you avoid yellow leaves or stunted fruit.
Quick Tip: Peppers are slow to show stress. Nutrient issues might take one or two weeks to appear, so small, careful adjustments are much safer than big changes. Thoughtful nutrient planning pays off with healthy plants and tastier, more abundant fruit.
Tip 4: Smart Irrigation Scheduling in Dutch Bucket Cultivation
1. Keep the Roots Happy with Short, Frequent Drips
In Dutch bucket systems, I like to water my chili plants several times a day with small amounts. This keeps the root zone comfortably moist without drowning it, helping nutrients stay available and roots happy. Frequent, gentle watering gives the plants a steady supply of what they need and keeps growth consistent.
2. Don’t Let Roots Stay Soaked All the Time
Roots need air as much as water. Leaving them in a permanently wet state can suffocate them and invite root rot. Proper drainage and carefully timed irrigation cycles make sure the roots get both moisture and oxygen, which is essential for healthy growth.
3. Let the Medium Breathe Between Watering
A slight wet-to-dry rhythm is actually good for chili roots. Allowing the growing medium to dry just a little between irrigation cycles encourages stronger roots and better nutrient uptake. This gentle “breathing” also helps prevent fungal problems and keeps the root zone healthy.
4. Prevent Salt Accumulation in Recirculating Systems
Over time, leftover nutrients can accumulate in the substrate, causing salt stress and making it harder for roots to take up water. Occasionally flushing with clean water or a balanced nutrient solution keeps salts in check and roots working efficiently.
Quick Tip: The timing and rhythm of watering often matter more than the exact nutrient formula. A well-managed irrigation schedule helps your roots thrive, your plants grow stronger, and your peppers produce better fruits.
Tip 5: Environmental Control for Productive Capsicum Growth
1. Keep Temperatures Comfortable for Happy Roots and Flowers
Peppers grow best when daytime temperatures stay between 18 and 24°C. This range keeps roots active, metabolism steady, and flowers developing nicely. Too cold slows growth and delays flowering, while too much heat can make flowers drop, fruit poorly, or stress the plant. Stable temperatures are especially important indoors, where plants rely entirely on us to create the perfect environment.
2. Light Up Their Day for Strong Growth
Capsicum plants love plenty of light, ideally 14 to 18 hours a day. Good light drives photosynthesis, helping leaves, stems, flowers, and fruits grow strong. Without enough light, plants become leggy, leaves stay small, and fruit yields drop. Using full-spectrum grow lights at the right distance keeps plants compact and productive.
3. Give Them a Helping Hand with Pollination
In greenhouses or indoor setups, natural wind and pollinators are limited. Gently shaking flowers, brushing pollen between blooms, or increasing airflow helps fruit set. This little extra attention makes a big difference, improving fruit shape, increasing yields, and reducing dropped flowers. For a deeper look at pollination techniques, check out pollination tips.
4. Keep the Air Moving to Strengthen Plants
Good air circulation reduces humidity around leaves, limiting fungal problems like powdery mildew and botrytis. It also gently “exercises” the stems, making them sturdier, and improves transpiration. Think of airflow as an invisible helper, moving nutrients like calcium around the plant and preventing blossom end rot or leaf tip burn.
Quick Tip: Air movement may not be a nutrient you can pour into the roots, but it’s just as important. It keeps your peppers healthy, strong, and productive.
Tip 6: Plant Training and Yield Management Techniques
1. Give Your Flowers a Helping Hand
Indoor fruiting plants don’t have the luxury of wind or pollinators. Gently shaking flowers or using a small brush to transfer pollen can make a huge difference. This little extra care helps fruits form better, reduces dropped flowers, and ensures more uniform yields. In greenhouses or hydroponic setups, assisted pollination is like giving your plants a boost exactly when they need it.
2. Clear the Lower Leaves for Better Airflow
Removing old leaves at the bottom of the plant may seem minor, but it works wonders. It improves airflow around the roots and lower canopy, reducing humidity and the risk of fungal issues. Plus, it allows the plant to focus its energy on active growth, flowers, and fruit instead of maintaining tired, unproductive leaves.
3. Prune Side Shoots to Keep Plants Balanced
Side shoots compete for light and nutrients. By selectively trimming them, you keep the plant structure open, let light reach more leaves, and improve airflow through the canopy. This gentle shaping helps the plant concentrate energy on flowers and fruits, which leads to larger, tastier peppers.
4. Support Branches Under Heavy Fruit Loads
As fruits grow, branches can bend or even snap under the weight. Providing support with stakes, strings, or trellises keeps fruits exposed to light and air, reduces stress, and helps them develop evenly. Proper support ensures your plants stay strong and productive throughout the season.
Quick Tip: A little controlled stress, achieved through careful pruning and structured support, encourages plants to put more energy into fruiting, which often improves sweetness and overall quality.
Summary: Pollination, pruning, and structured support work together like a team, boosting fruit yield, improving quality, and keeping plants healthy in indoor or hydroponic systems.
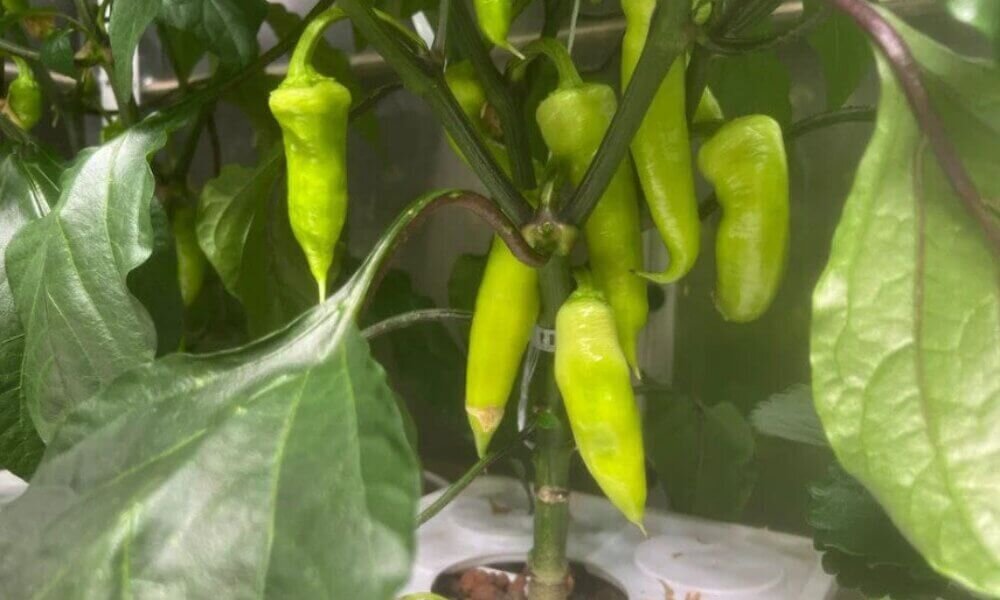
Tip 7: Harvest Timing and Yield Optimization
1. Pick at the Perfect Time for Flavor
Peppers usually take about 50–80 days from germination to reach their best flavor, depending on the variety and growing conditions. Small, fast-growing types might be ready sooner, while larger or thick-walled peppers need a bit more patience. Keep your plants warm, well-fed, and well-lit, and you’ll be rewarded with vibrant fruits at just the right moment.
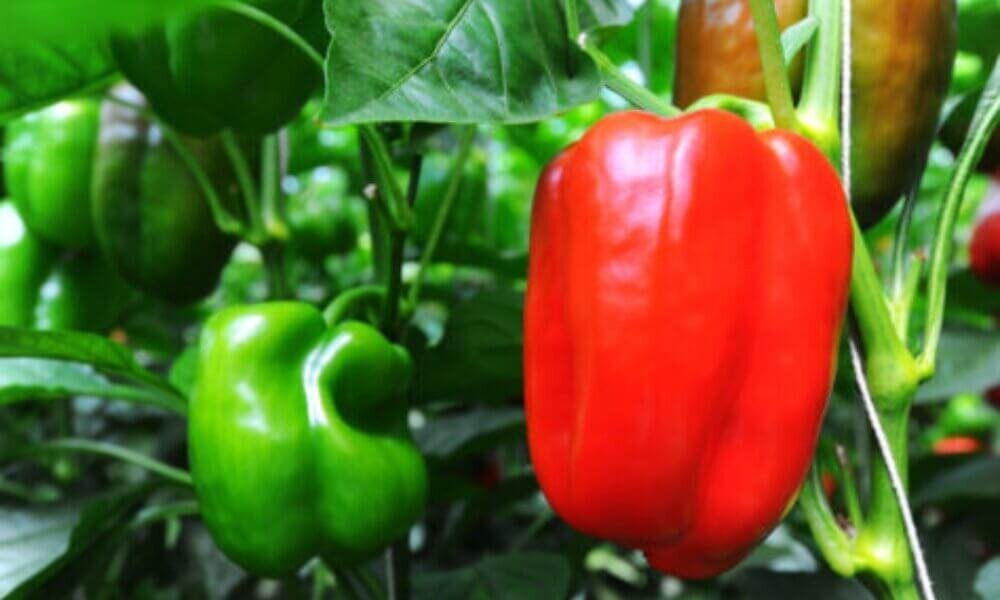
2. Let Color Guide You
You can harvest peppers when they’re still green, which works well for many recipes. If you wait for them to fully ripen and turn red, yellow, or orange, you will get sweeter, more aromatic fruits packed with extra nutrients. Watching that gradual color change on the plant is part of the fun.
3. Pick Often to Keep the Harvest Coming
Regularly picking mature peppers encourages the plant to keep flowering and setting new fruit. Leaving peppers on too long can signal the plant to slow down and focus on seed development. A consistent harvest not only extends your picking season but also boosts overall yield.
Common Growing Problems and Practical Fixes in Soilless Systems
| Problem | Possible Causes | Solutions |
|---|---|---|
| Flower Drop | Temperature stress, poor pollination, inconsistent watering | Keep temperature stable, assist pollination, maintain regular watering |
| Yellowing Leaves | Nutrient imbalance, overwatering, poor drainage | Adjust nutrient strength & pH, improve drainage and root oxygen |
| Small Fruits | Insufficient light, low potassium, overcrowding | Increase light, boost potassium, space plants properly |
| Root Rot | Poor aeration, high temps, pathogens in wet roots | Improve oxygenation, keep system clean, avoid overwatering |
| Leaves Curling | Heat stress, low humidity, light too strong | Lower temperature, improve airflow, adjust light distance |
| Flowers but No Fruit | Lack of pollination, excess nitrogen | Assist pollination, reduce nitrogen, increase P & K |
| Leaf Edge Browning (Calcium Issue) | Poor calcium uptake, weak transpiration, irregular watering | Improve airflow, keep watering consistent, ensure calcium supply |
| Slow Growth | Low temperature, weak light, incorrect pH | Optimize temperature, extend light hours, correct pH |
| Wilting with Water Present | Root damage, low oxygen, early root disease | Check roots, increase aeration, treat root zone issues |
| Uneven Fruit Shape | Incomplete pollination, environmental stress | Stabilize environment, support pollination |
While the table above helps with quick diagnosis, real growing situations are often more complex. Below are real Dutch bucket chili growing cases showing how problems develop and how adjustments actually improved plant performance.
🌶 Real Growing Mistakes & Fixes from Dutch Bucket Chili Production
Case 1 – Roots Turning Brown Even Though Irrigation Looked “Correct”
At first, everything seemed fine. The plants stood upright, the leaves were green, and the irrigation ran on schedule three times a day with plenty of solution.
After about two weeks, we noticed the lower leaves slowly turning pale and growth feeling weaker than before. Curious, we lifted one bucket to check the roots. That is when the problem became clear. The roots were not white and crisp. They were light brown, slightly soft, and the growing media was constantly wet.
We realized the issue was not a lack of water. The plants were lacking air. Chili roots behave more like semi-arid plants than leafy greens and they do not like sitting in moisture all day.
Instead of reducing the total water, we adjusted the watering rhythm. Irrigation was changed from three long cycles to eight short pulses spread across the day. Each pulse refreshed the moisture without saturating the bucket, and we slightly widened the drainage holes.
The results came quickly. Within a week, new roots grew bright white again, leaf color improved, and flowering resumed soon after.
Takeaway: In Dutch bucket chili growing, the rhythm of watering matters more than total water volume.
Case 2 – Flowers Dropping but Plants Looked Healthy
At first, the situation was confusing. The plants were tall, the leaves looked strong, and everything seemed vigorous. Yet the flowers kept dropping before any fruit could form. It felt as if the plants were growing beautifully but refusing to produce.
Observing more closely made the problem clearer. The growing area was warm and still. Air movement was minimal and humidity stayed high most of the day. Under these conditions, pollen was not transferring properly between flowers.
To help, we installed a small oscillating fan to create gentle airflow around the canopy. Each morning, we also lightly shook the branches by hand to release pollen.
The results came sooner than expected. Within about a week, small fruits began forming in places where flowers had previously fallen.
Takeaway. Strong vegetative growth does not guarantee fruit production. Airflow and pollination support are just as important as nutrients in Dutch bucket pepper growing.
Case 3 – Leaf Edges Burning After Increasing Nutrients
The problem started right after we tried to push production. When the first fruits appeared, we increased the nutrient strength to aim for higher yields. A few days later, the leaf tips began turning brown and dry, and new fruits stopped enlarging.
At that point, the root system was not fully developed. The sudden increase in nutrient concentration acted as if the plants were already in peak fruiting mode, creating salt stress that the young roots could not handle.
We responded by reducing the nutrient strength immediately and then increasing it gradually over the next ten days instead of making one big adjustment.
The results were clear. New growth returned healthy and fruit development continued normally after the change.
Takeaway: Nutrient strength should match root maturity, not only the plant’s visible growth stage.
Case 4 – Plants Wilting Midday Even Though Media Was Wet
At first, it looked like a watering problem. The plants wilted during the hottest part of the afternoon, but the growing media was clearly moist. Adding more water did not help.
The real issue turned out to be root oxygen. Constant moisture combined with high temperatures reduced oxygen levels in the root zone. Even though water was available, the roots could not function properly.
We addressed this by extending the interval between watering cycles and moving the last irrigation earlier in the day. We also shaded the buckets to lower root-zone temperature.
The results came quickly. Within a few days, wilting stopped and the plants handled heat much better.
Takeaway: Moist media does not always mean healthy roots. Oxygen availability is just as important as water.
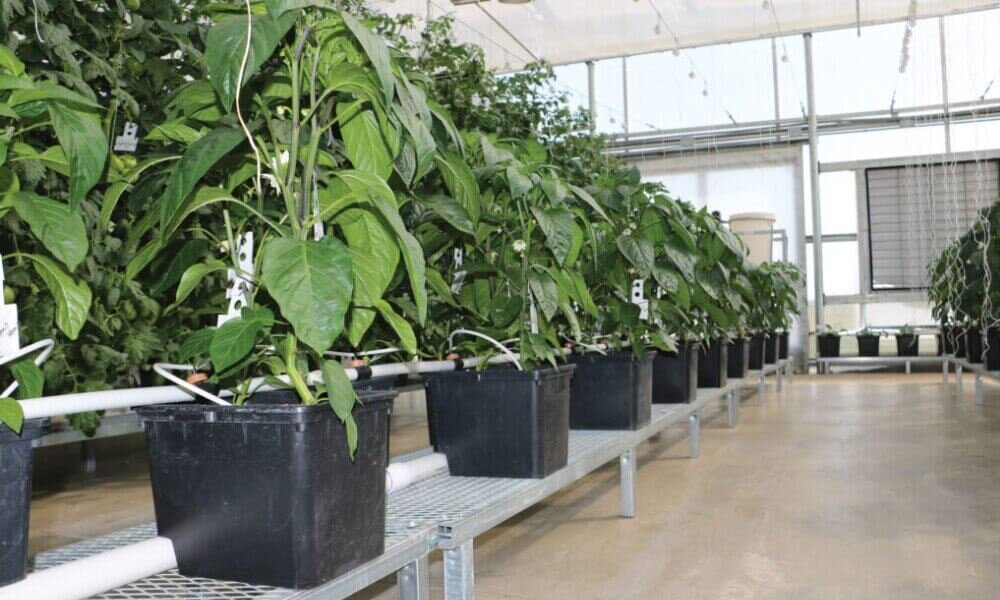
Why Commercial Growers Prefer Dutch Bucket Cultivation

Many commercial growers do not choose Dutch Buckets because they are trendy. They choose them after seeing how many production problems the system helps prevent in real operations. One major advantage is scalability. A grower can start small and simply add more buckets as demand increases, without rebuilding the whole structure each time.
Disease control is another important reason. Since each bucket has its own root zone, problems like root rot usually stay contained instead of spreading through the entire crop. Losing one plant is manageable, but losing a whole system can be disastrous.
Reliability also plays a big role. If one bucket becomes clogged or a dripper fails, the rest of the plants continue growing normally. The issue stays local rather than turning into a system-wide failure. In commercial growing, stability often matters more than pushing for maximum yield. Dutch Buckets give growers more control and fewer large-scale risks, which is why they remain a preferred choice.
Frequently Asked Questions About Growing Chili in Dutch Buckets
Peppers prefer consistent moisture but not waterlogging. Use drip irrigation with multiple short cycles per day, and ensure excess solution drains well to keep roots oxygenated.
Maintain pH between 5.8–6.5 and EC around 2.0–3.5 mS/cm, increasing slightly during flowering and fruiting to support higher nutrient demand.
Yes. Remove lower leaves and weak side shoots to improve airflow and direct energy toward fruit production. Pruning also reduces disease risk in dense canopies.
Common causes include temperature stress, poor pollination, or excess nitrogen. Keep daytime temperatures stable, assist pollination indoors, and balance nutrients with more potassium during flowering.
Provide strong light, stable temperatures, and sufficient potassium and calcium. Support branches as fruits develop and harvest regularly to stimulate continued production.
Key Takeaways for Successful Dutch Bucket Fruit Crop Production
A successful growing system depends on six core factors: water, oxygen, support, nutrition, environment, and pollination with pruning. Proper water management keeps roots hydrated without stress. Adequate oxygen in the root zone maintains strong and healthy root activity. Reliable structural support protects plants during heavy fruiting stages. Balanced fertilization supplies the nutrients needed for steady growth and high-quality yields. A stable environment that includes temperature, light, and airflow helps prevent stress and disease. Effective pollination combined with proper pruning directs plant energy toward fruit production, improving both yield and overall quality.
When all six elements are managed together, plants perform more consistently, grow more productively, and use resources more efficiently. For those interested in Dutch bucket systems for tomatoes, see the complete guide.
Start Building a High-Yield Dutch Bucket Growing System Today
Growing peppers successfully in a Dutch Bucket system is not just about theory it comes from understanding how irrigation rhythm, root-zone oxygen, pruning, and nutrient balance work together. Once these key factors are stable, pepper plants become highly productive and much easier to manage.
If you are planning to start or improve a Dutch Bucket setup for peppers or other fruiting crops, choosing the right buckets, substrate, drip system, and support structure makes a big difference in yield and plant health.
We share practical hydroponic growing knowledge and system guidance to help growers build stable, efficient production setups.
📩 info@greenfuturehydro.com
📞 +86 13487543942
📷 Instagram @Greenfuturehydro
Follow us for more practical hydroponic growing tips and system guidance, or contact us to find the right equipment and setup for your pepper production goals. 🌱🌶️