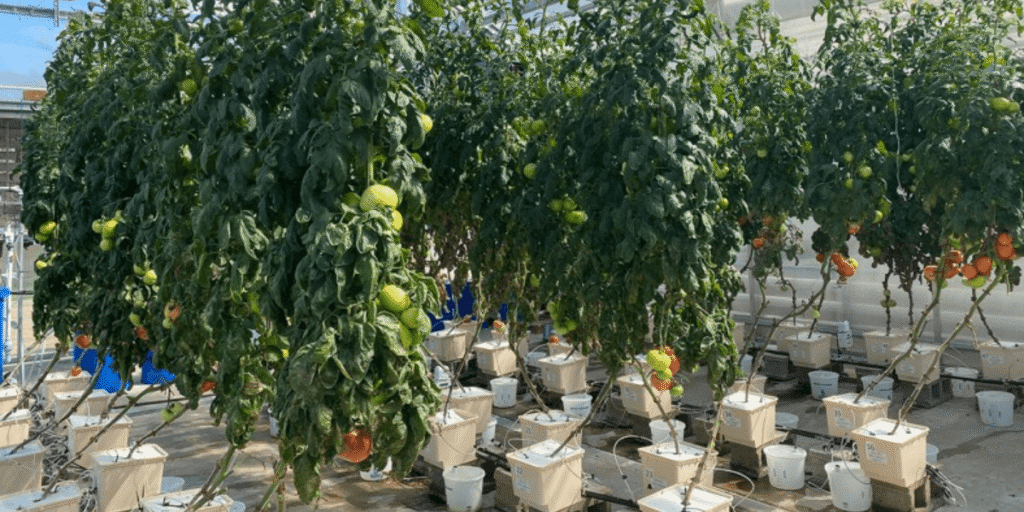
Dutch Bucket Tomato Growing stands out as one of the most efficient and reliable hydroponic methods for cultivating high-yielding vine crops such as tomatoes, cucumbers, and peppers. This system combines a stable container structure with an efficient water and nutrient recirculation setup, making it equally ideal for both home growers and commercial greenhouses.
In this guide, we will walk you through every stage of hydroponic tomato cultivation using the Dutch bucket system, from setup and nutrient management to environmental control and harvesting. Whether you are a beginner or an experienced grower aiming to maximize yields, this comprehensive walkthrough uncovers the key strategies for achieving healthy growth and abundant harvests all year round.
System Setup and Transplanting for Dutch Bucket Tomato Growing
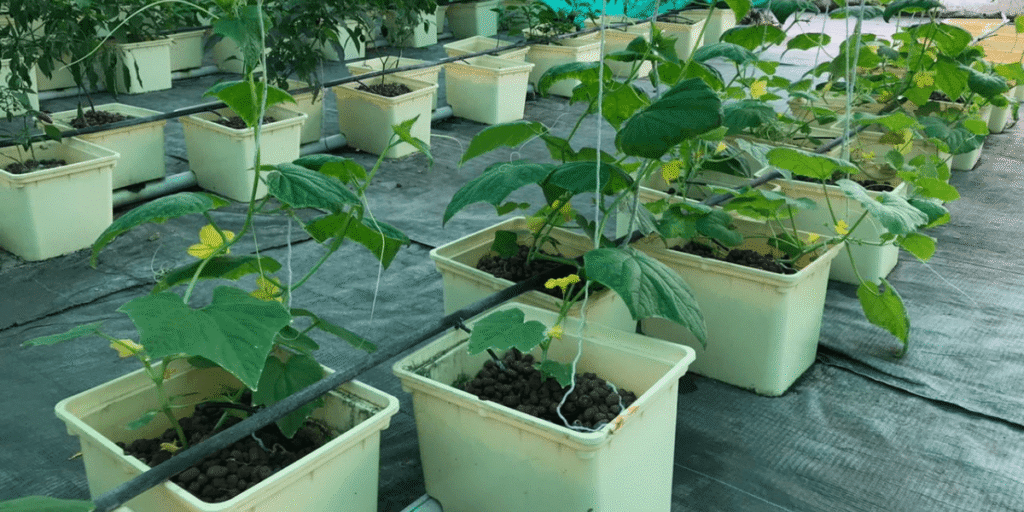
Dutch Bucket Tomato Growing System Components
Let’s start by understanding what makes up a Dutch bucket system and how each part works together. Each bucket usually holds about 3 to 5 gallons of growing medium and comes with a small siphon elbow at the bottom. This simple piece helps maintain a shallow layer of nutrient solution so that the roots stay moist without sitting in too much water. It’s a clever way to keep the balance between hydration and oxygen.
A typical setup includes a few key parts: a nutrient reservoir where your water and fertilizer mix is stored, a return pipe that gently slopes back to the tank to allow smooth drainage, a pump that keeps the solution circulating, and drip emitters that feed each plant directly. When you’re setting up your system, take your time to think through the layout. You’ll want to avoid any spots where water might pool or sit still for too long, since that can lead to algae growth or root problems later on.
It’s also smart to use materials that resist algae buildup, especially if your setup gets a lot of light. Try to design the system so it’s easy to reach the pipes and fittings when it’s time to clean or make adjustments. A well-thought-out system not only keeps your plants healthier but also makes maintenance much easier down the line.
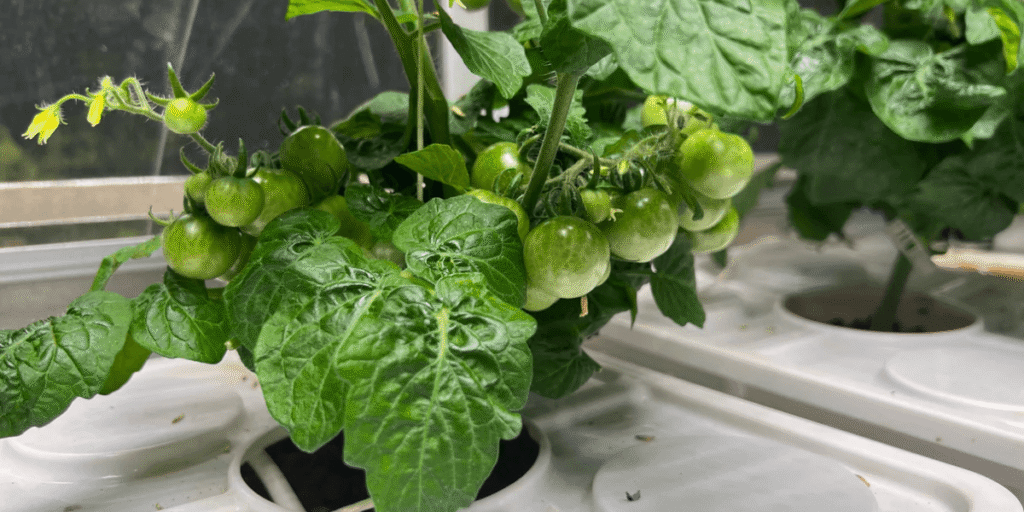
Transplanting Tomatoes in Dutch Bucket Systems
When it’s time to move your seedlings into the Dutch bucket system, the goal is to make the transition as gentle and effective as possible. The choice of growing medium plays a big role in this process. A simple mix of perlite and coco coir in equal parts works beautifully. Perlite keeps plenty of air around the roots to prevent suffocation, while coco coir holds just enough moisture to keep them hydrated.
For spacing, place one or two tomato seedlings in each bucket. Leave about 60 centimeters, or roughly two feet, between plants so they have enough space to expand their canopy and allow air to move freely around them. Proper airflow reduces the risk of diseases and supports healthy growth.
You’ll know your seedlings are ready when their roots reach about 10 to 15 centimeters in length and look strong and white. Carefully place each seedling into the growing medium and position the drip emitter close to the roots. This setup ensures the plants receive consistent water and nutrients right where they need them most. With the right conditions and a bit of care, your tomatoes will quickly settle in and start thriving.
Nutrient and Environment Management in Dutch Bucket Tomato Growing
Optimal Nutrient Levels for Dutch Bucket Tomatoes
Maintaining the right nutrient balance is key to healthy and productive tomato plants.
| Growth Stage | EC (mS/cm) | pH Range | Key Focus |
|---|---|---|---|
| Vegetative Stage | 1.8 – 2.2 | 5.8 – 6.3 | Maintain higher nitrogen levels to encourage strong leaf and stem growth. |
| Flowering & Fruiting Stage | 2.2 – 2.8 | 5.5 – 6.5 | Increase potassium and calcium to enhance blossom formation and fruit development. |
Replace the nutrient solution every 7–14 days, and keep dissolved oxygen levels above 6 mg/L to ensure optimal root health and prevent anaerobic conditions.
Irrigation Schedule for Dutch Bucket Tomato Growing
Getting your watering routine right makes a huge difference when growing tomatoes in a Dutch bucket system. During the day, it’s best to use short, pulsed irrigation cycles so the roots get steady access to moisture and nutrients without becoming waterlogged. At night, give your plants a break from watering so the roots can breathe and take in oxygen.
When your plants are still young, aim for about three to five short watering cycles per day. As they grow larger and start producing fruit, increase that to eight to twelve cycles per day, especially on hot days or when your grow lights are running at full intensity.
A timer-controlled drip system can make this process a lot easier and more consistent. It ensures your plants get exactly what they need, right when they need it, keeping their growth steady and their fruit development on track.
Light and Temperature Control in Dutch Bucket Systems
Tomatoes love soaking up the light, and the more consistent it is, the happier they are. Try giving them around 12 to 16 hours of light each day to keep their energy flowing and photosynthesis going strong. When they’re still growing leaves and stems, aim for a light intensity between 400 and 800 µmol/m²/s. Once flowers and fruits start appearing, bump that up to about 900 to 1000 µmol/m²/s to help those fruits develop beautifully.
Temperature is just as important. Keep the water nice and comfortable, ideally between 18 and 24°C (65–75°F), so the roots stay healthy. For the air, somewhere around 22 to 28°C (72–82°F) is perfect tomatoes don’t do well if it’s too chilly or scorching hot. It also helps to keep humidity in the 60 to 70% range. That way, the leaves stay hydrated, and you can avoid most fungal issues.
When you get the light, temperature, and humidity just right, your tomato plants will thrive growing fast, staying lush, and rewarding you with lots of juicy, flavorful fruit.
Plant Physiology and Nutrient Management for Dutch Bucket Tomatoes
Tomato Growth Stages and Changing Requirements in Dutch Bucket Growing
Tomatoes grow in several clear stages, and each stage comes with its own needs. From seedlings to flowering to fruiting, their environment and nutrients change along the way. When you understand what each stage requires, you can adjust your setup as the plants grow instead of following the same routine all the time. This flexible approach helps keep your plants healthy and ensures a strong, steady harvest.
| Growth Stage | EC / pH | Irrigation Frequency | Temperature / Humidity | Light (hours/day) | PPFD (µmol/m²/s) |
|---|---|---|---|---|---|
| Seedling | 1.5 / 6.0 | 2–3 times per day | 24°C / 70% | 14 | 300–400 |
| Vegetative | 2.0 / 6.0 | 4–6 times per day | 25°C / 65% | 14–16 | 600–800 |
| Flowering | 2.4 / 5.8 | 6–8 times per day | 24°C / 60% | 14 | 800–900 |
| Fruiting | 2.6 / 5.8 | 8–12 times per day | 22°C / 60% | 12–14 | 900–1000 |
Each stage requires tailored management of EC, pH, irrigation frequency, and light intensity. Adjusting these parameters ensures steady vegetative growth early on and maximized fruit production later. A Growth Timeline Chart can visually represent these transitions for easier monitoring and adjustment.
Understanding Nutrients for Dutch Bucket Tomatoes
Growing tomatoes successfully in a Dutch bucket system starts with understanding what nutrients your plants need and how they work together. Once you get a feel for this, adjusting your feeding schedule becomes much easier and your plants will reward you with steady, healthy growth.
Primary Nutrients
- Nitrogen (N): Fuels lush leaf and stem growth, helping your plants stay vibrant and full.
- Phosphorus (P): Builds a strong root system and supports flower and fruit development.
- Potassium (K): Enhances fruit sweetness, color, and overall quality.
- Calcium (Ca): Strengthens cell walls and prevents common problems like blossom-end rot.
- Magnesium (Mg) & Sulfur (S): Essential for photosynthesis and chlorophyll production, keeping your leaves green and active.
Micronutrients: Even in tiny amounts, elements like iron, manganese, zinc, copper, boron, and molybdenum play big roles. They support enzyme function, hormone activity, and overall plant health especially during flowering and fruiting.
Spotting Deficiencies
- Yellowing leaves usually mean a lack of nitrogen.
- Misshapen or deformed fruits can signal a boron deficiency.
- Burned or brown leaf edges often indicate low potassium.
Balancing Your Nutrient Mix
A well-balanced hydroponic formula for tomatoes often looks like this: N : P : K : Ca : Mg = 13 : 6 : 20 : 5 : 3
When adjusting nutrients, take it slow and make small, steady changes as your plants develop. Avoid mixing calcium with sulfate-based fertilizers in the same solution to prevent nutrient lockout.
With a bit of observation and consistency, your Dutch bucket tomatoes will grow strong, balanced, and productive from seedling to harvest.
Lighting and Air Optimization for Dutch Bucket Tomato Growing
Lighting Optimization – Spectrum and LED Selection for Dutch Bucket Tomatoes
Light is one of the most important factors for growing healthy, productive hydroponic tomatoes. Different parts of the light spectrum affect your plants in different ways. Red light, around 660 nanometers, encourages flowering and helps fruits develop. Blue light, around 450 nanometers, supports strong leaf and stem growth. White light provides a balanced spectrum and improves overall fruit quality and color.
To make sure your plants always get enough light, especially during winter or on cloudy days, use full-spectrum LED grow lights. Position the lights about 30 to 50 centimeters above the canopy. This keeps the intensity right without stressing the plants with too much heat and helps your tomatoes grow evenly and produce better fruit.
Recommended LED options:
| Type | Advantages | Best Use |
|---|---|---|
| Full-Spectrum Panel | Provides uniform coverage and stable light intensity | Greenhouses or indoor farms |
| COB Light | Strong light penetration for taller plants | Large or vertical setups |
| LED Strip Light | Energy-efficient and easy to install | Compact or small growing spaces |
Selecting the right lighting setup ensures even light distribution, strong growth, and better fruit yield across all stages.
CO₂ Enrichment and Air Circulation in Dutch Bucket Tomato Growing
Managing CO₂ levels and airflow properly can make a big difference in how your tomato plants grow and produce fruit. The sweet spot for CO₂ is around 800 to 1200 ppm, which helps boost photosynthesis and overall productivity. You can increase CO₂ using dry ice, tanks, or CO₂ generator bags, which release it steadily into your growing area.
Good air circulation is just as important. Setting up top exhaust fans with bottom air inlets creates a gentle vertical airflow, which helps control humidity and improves pollination. Keeping humidity at the right level prevents problems like gray mold and encourages flowers to set properly.
When you combine the right CO₂, airflow, and humidity with proper lighting, you create a balanced environment where tomatoes grow strong, stay healthy, and produce consistent, high-quality fruit.
Advanced Management and Harvest for Dutch Bucket Tomatoes
Integrated Pest and Disease Management for Dutch Bucket Tomato Growing
Common diseases include gray mold, leaf mold, and root rot, while common pests are whiteflies, aphids, and spider mites.
To maintain a healthy growing environment:
- Ensure proper ventilation to reduce humidity buildup.
- Clean hydroponic pipes and growing equipment regularly.
- Control moisture levels to prevent fungal infections.
- Use biological pesticides such as neem oil or Bacillus thuringiensis (Bt) for sustainable pest management.
Harvesting and Quality Control of Dutch Bucket Tomatoes
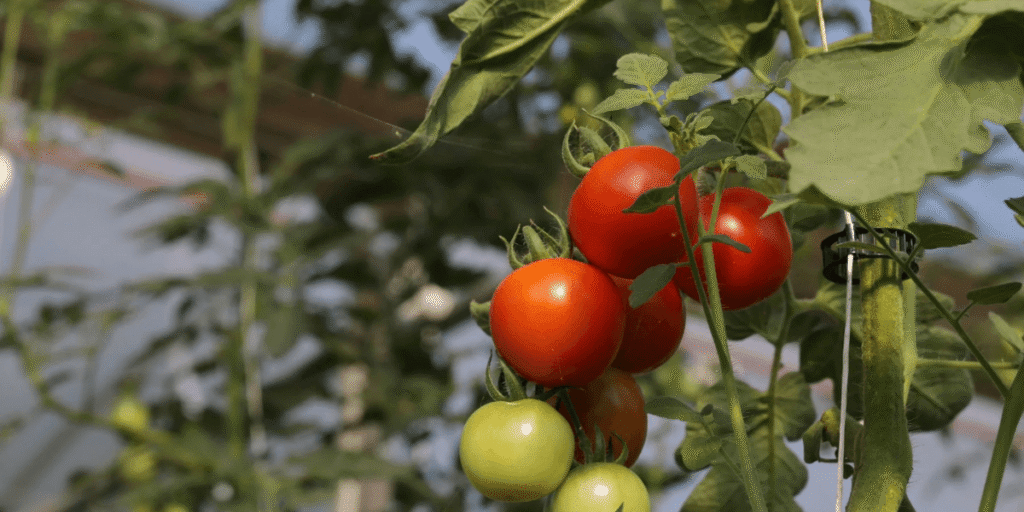
When to Harvest: Tomatoes are ready for harvest when they show 80–90% color development and release a noticeable, sweet fragrance. This stage indicates full flavor and optimal ripeness.
How to Harvest: Use clean scissors or pruning shears to cut the fruit stem carefully. Avoid pulling or twisting the fruit, as this can damage the plant and affect future yields.
Post-Harvest Handling: After harvesting, store the fruits at a temperature between 12–15°C. This helps prevent chilling injury and preserves the texture, flavor, and overall quality of the tomatoes.
Maintaining Continuous Production: To keep your plants productive, remove old or yellowing leaves regularly and keep new flower clusters intact. Consistent nutrient supply and stable lighting conditions are also essential to support continuous growth and high yields.
Practical and Commercial Insights in Dutch Bucket Tomato Growing
Cost and Yield Analysis of Dutch Bucket Tomato Growing
| Item | Cost Estimate | Description |
|---|---|---|
| Initial Equipment | Medium to High | One-time investment with long-term use |
| Nutrient Solution | Moderate | Recyclable and adjustable for various crops |
| Labor & Maintenance | Low | Automation reduces manual workload |
| Average Yield | 4–6 kg per plant | Premium varieties can reach up to 8 kg |
ROI Insight: Home hydroponic systems typically achieve a return on investment within 6–12 months, while commercial greenhouses may recover costs in 1–2 years depending on scale and efficiency.
Case Studies and Best Practices in Dutch Bucket Tomato Growing
Greenfuture Hydro Project: One of the most successful examples is the Greenfuture Hydro greenhouse model. It showcases how an optimized system configuration, stable nutrient cycling, and precise environmental control can lead to consistently high yields throughout the year. This project serves as a benchmark for efficient and scalable hydroponic production.
Customer Success Story: Another inspiring story comes from one of our customers who began as a complete beginner. Through continuous learning, careful observation, and system optimization, they transformed their setup into a reliable, productive hydroponic garden that now produces healthy vegetables and herbs every season.
Frequently Asked Questions about Dutch Bucket Tomato Growing
It’s best to replace the nutrient solution every 7–14 days. This prevents nutrient imbalance, salt buildup, and ensures consistent tomato growth throughout each stage.
Perlite and coco coir are ideal for Dutch bucket systems. They provide excellent drainage and oxygenation, which helps prevent root rot and supports healthy root development.
If your tomatoes receive at least 12–14 hours of strong natural light, additional lighting isn’t necessary. However, during cloudy or winter days, using full-spectrum LEDs helps maintain stable growth and fruit quality.
Maintain air temperature between 22–28°C during the day and 18–22°C at night, with 60–70% humidity. Consistent climate control ensures better pollination and fruit set.
Keep the environment clean, ensure good airflow, and regularly inspect plants. Use biological control methods like neem oil or Bacillus thuringiensis (Bt) to safely manage pests such as whiteflies and aphids.
Ready to Start Your Own Dutch Bucket Tomato Growing System?
There’s no better time than now to enjoy the satisfaction of growing fresh, juicy tomatoes right in your home or greenhouse. With the right tools and setup, you can achieve consistent harvests and experience the joy of sustainable, soil-free gardening all year round.
Explore our recommended tools to help you get started:
🔗 Dutch Bucket Kit – A complete hydroponic setup for easy installation, stable growth, and high productivity.
🔗 EC/pH Meter – Monitor your nutrient balance precisely to ensure stronger, healthier plants.
🔗 Home Tomato Growing Kit – Perfect for small indoor gardens, simplifying setup while ensuring steady, high-yield tomato production.
To make your hydroponic journey even easier, explore Greenfuturehydro’s innovative growing solutions. Our modular systems, efficient irrigation tools, and user-friendly designs are built to help you maintain clean, productive setups with minimal effort. Whether you are a first-time grower or managing a larger greenhouse, our products are made to help your plants thrive and your harvests stay abundant.
Need expert advice or personalized support? The Greenfuturehydro team is always here to help. Reach us at info@greenfuturehydro.com or call +86 13487543942. We are dedicated to helping you build a productive, sustainable, and enjoyable indoor garden.
Follow us on Instagram @Greenfuturehydro for hydroponic tips, inspiring stories, and real experiences from growers around the world. Share your progress, learn from others, and experience the joy of cultivating fresh, vibrant tomatoes with confidence.
Conclusion on Dutch Bucket Tomato Growing Success
The Dutch Bucket system remains one of the most efficient and dependable methods for hydroponic tomato cultivation. Its well-balanced design ensures optimal water circulation, steady root-zone conditions, and consistent nutrient delivery, all of which are key factors that drive healthy growth and abundant yields.
Success with Dutch Bucket tomatoes comes down to precision and care. By maintaining proper nutrient levels, ensuring adequate lighting, and training your plants regularly, you create the foundation for vigorous vines and flavorful fruit.
Hydroponic gardening is as much about patience as it is about innovation. With every adjustment you make and every harvest you celebrate, your system becomes a reflection of your dedication and growing expertise. Stay consistent, stay curious, and your tomatoes will reward you with vibrant color, rich flavor, and the satisfaction of a thriving hydroponic garden.