Growing microgreens hydroponically is becoming increasingly popular among home gardeners, schools, restaurants, and indoor farming enthusiasts because these young greens are fast-growing, nutrient-rich, and easy to produce indoors year-round.
If you are new to hydroponics, it helps to first understand the basics of hydroponic systems so you know how everything works before starting your own setup.
In this guide, you will learn how to grow hydroponic microgreens using simple soilless methods, including the best beginner-friendly varieties, essential indoor growing equipment, LED lighting requirements, common growing problems, and practical system options for home, educational, and small commercial use.
What Are Hydroponic Microgreens?
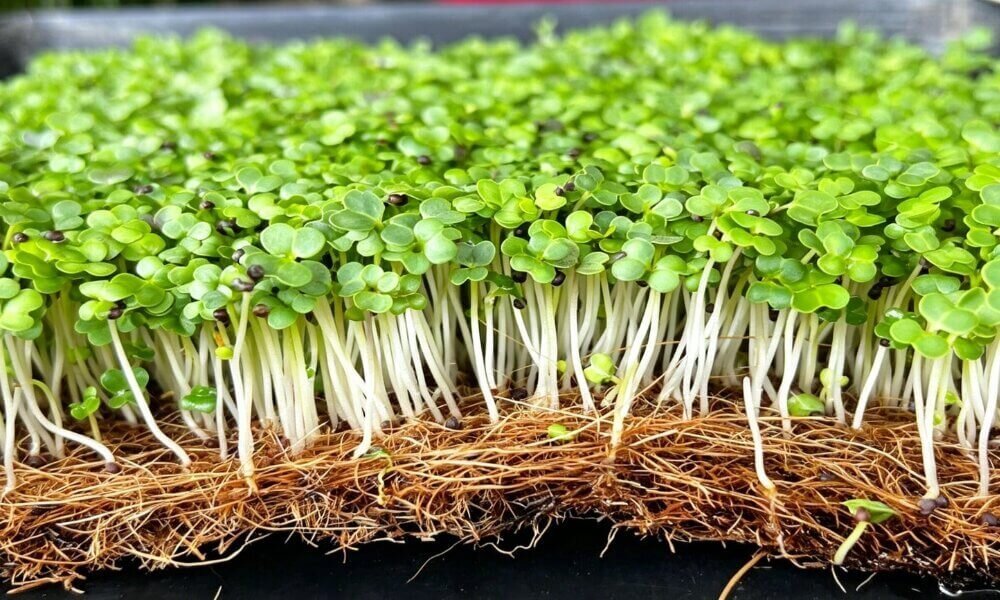
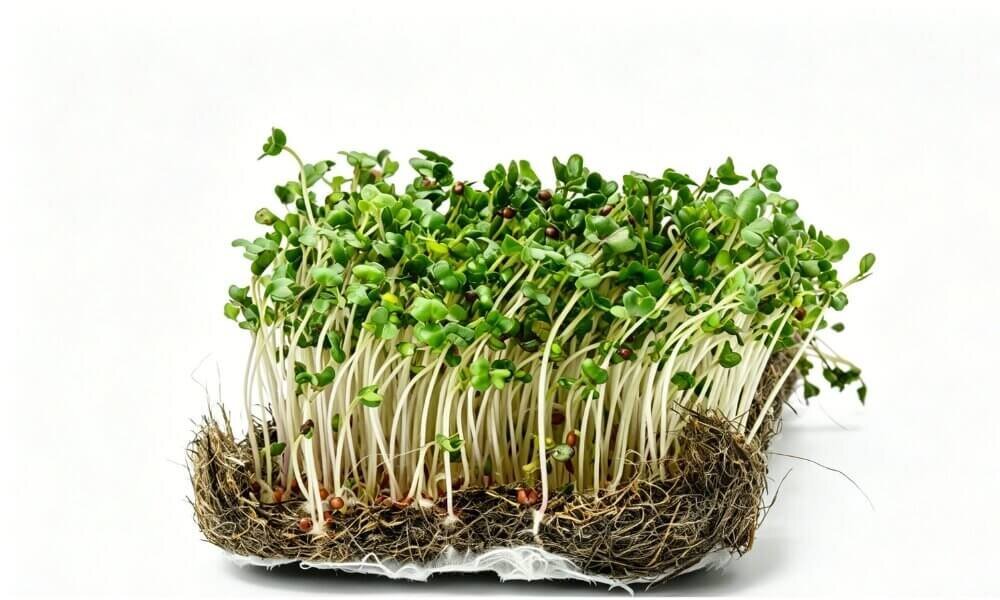
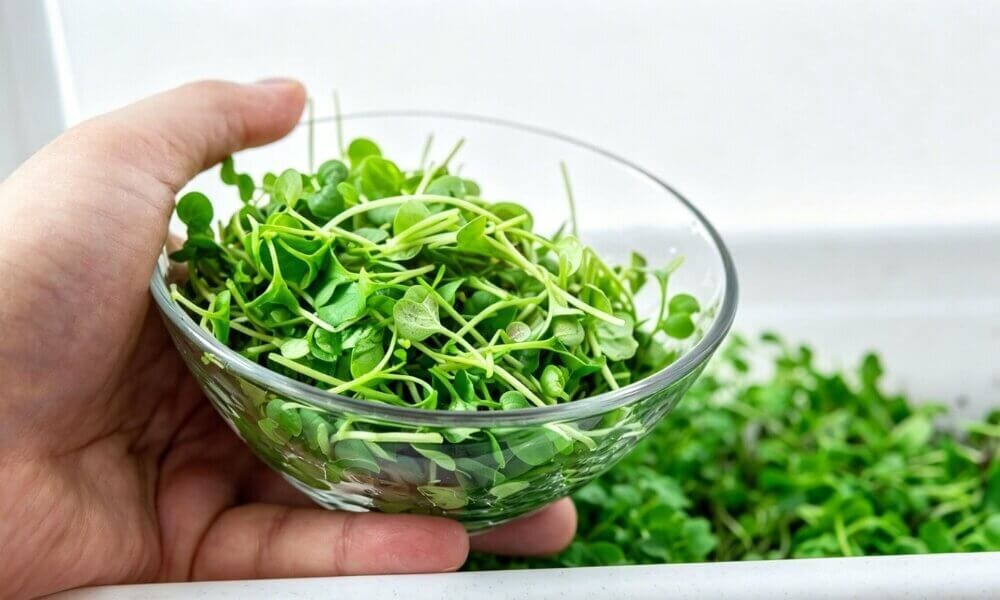
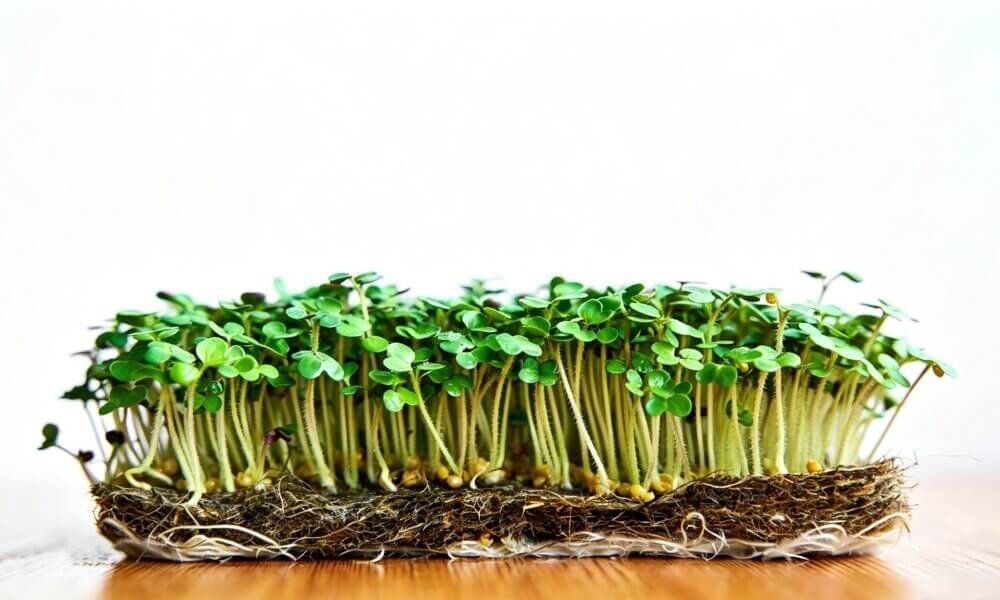
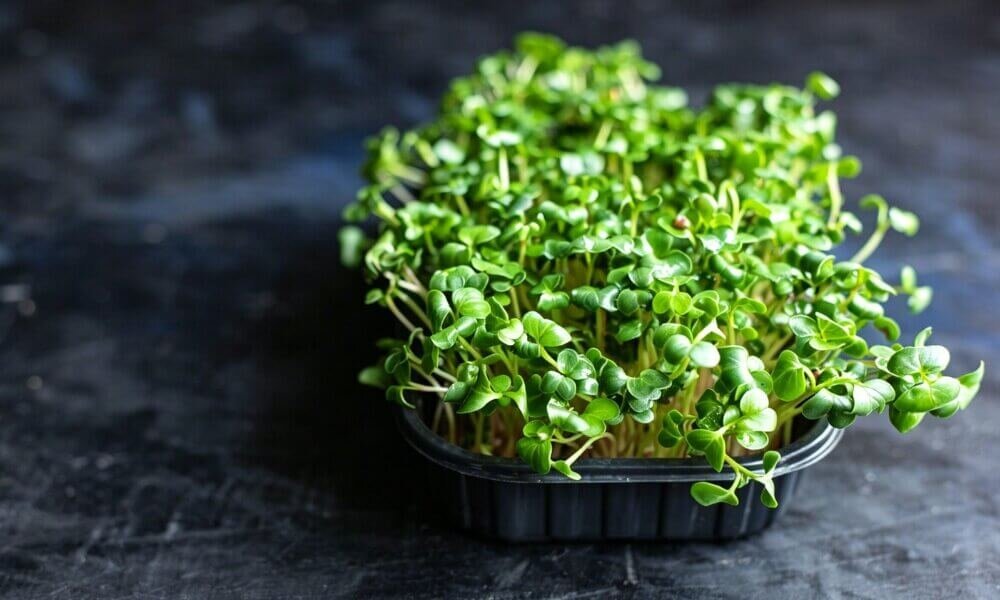
Hydroponic microgreens are young vegetable and herb plants grown without soil and harvested while they are still in their early stages of growth. Most microgreens are ready to harvest within 7 to 14 days after germination, once the first true leaves begin to appear.
They are usually grown on moisture-retaining materials such as coco coir, hemp mats, or jute pads, combined with a hydroponic growing system that provides water and nutrients directly to the roots. Because they grow so quickly, microgreens are a popular choice for indoor gardening, restaurants, and home growers looking for fresh produce year-round.
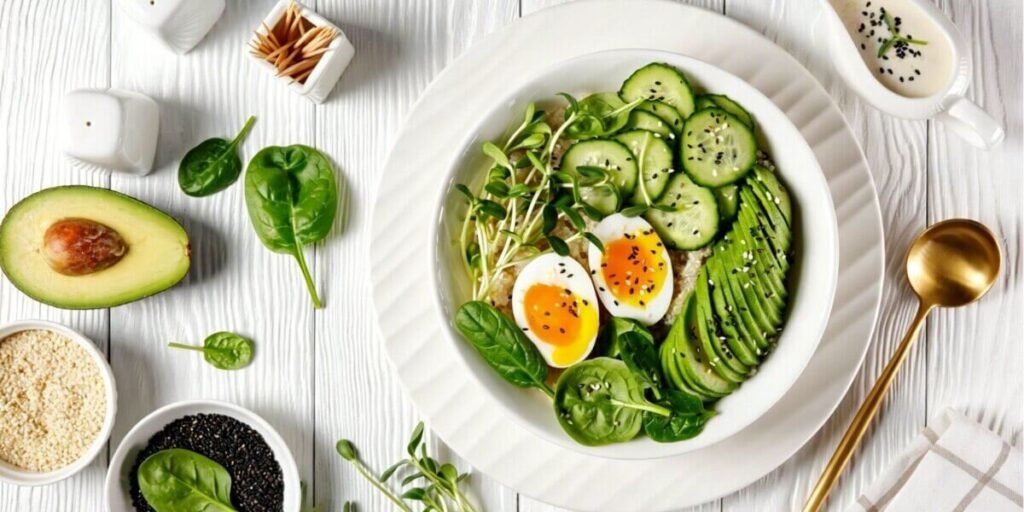
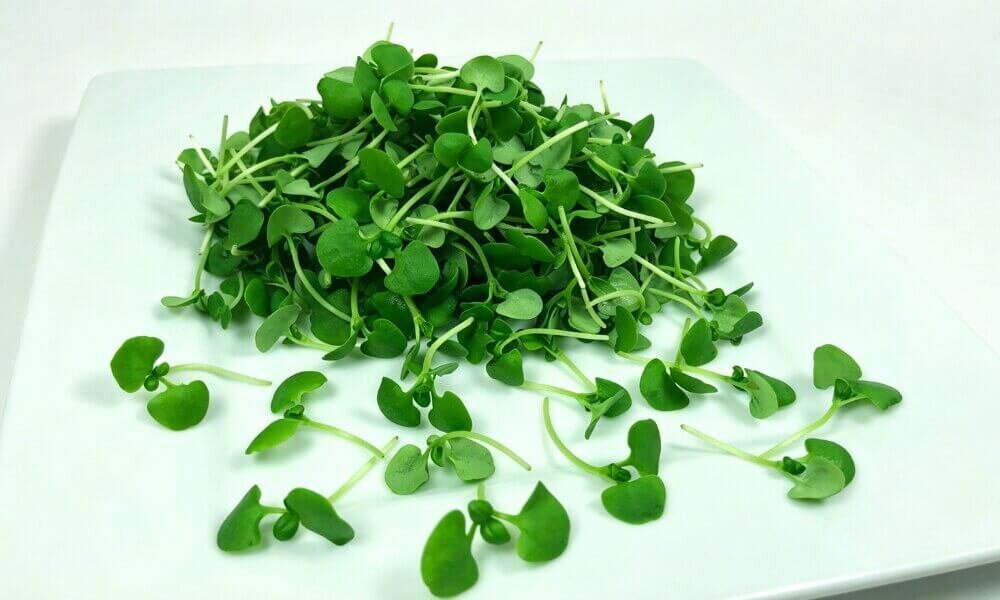
Although they are small in size, microgreens are known for their strong flavor, bright colors, and rich nutritional value. Common varieties include radish, broccoli, sunflower, kale, basil, and mustard. They are often used in salads, sandwiches, smoothies, and as decorative toppings for many dishes.
What Are Sprouts?
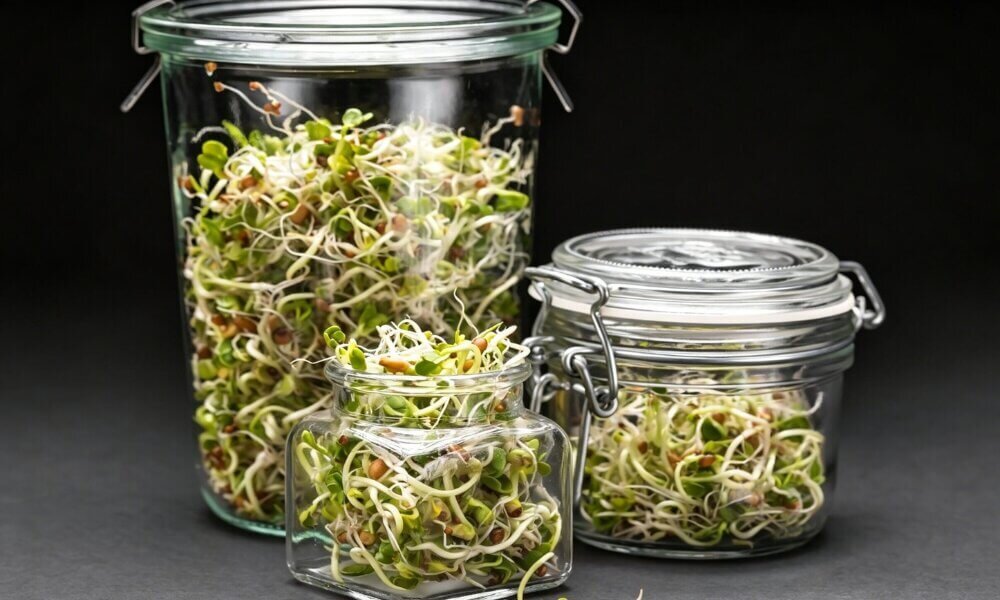
Sprouts are seeds that have just started to germinate and are grown entirely in water without soil or growing media. They are commonly produced in jars, trays, or simple sprouting containers where the seeds are rinsed several times a day to maintain moisture and cleanliness during the growing process.
Unlike microgreens, sprouts are harvested very early, usually within 2 to 5 days after germination, before any true leaves develop. At this stage, the whole sprout is edible, including the seed, root, and young shoot.
Sprouts are appreciated for their crisp texture, fresh taste, and fast growing cycle. Popular sprouting seeds include mung beans, alfalfa, broccoli, lentils, and radish. Because they require very little space or equipment, sprouts are considered one of the easiest foods to grow at home.
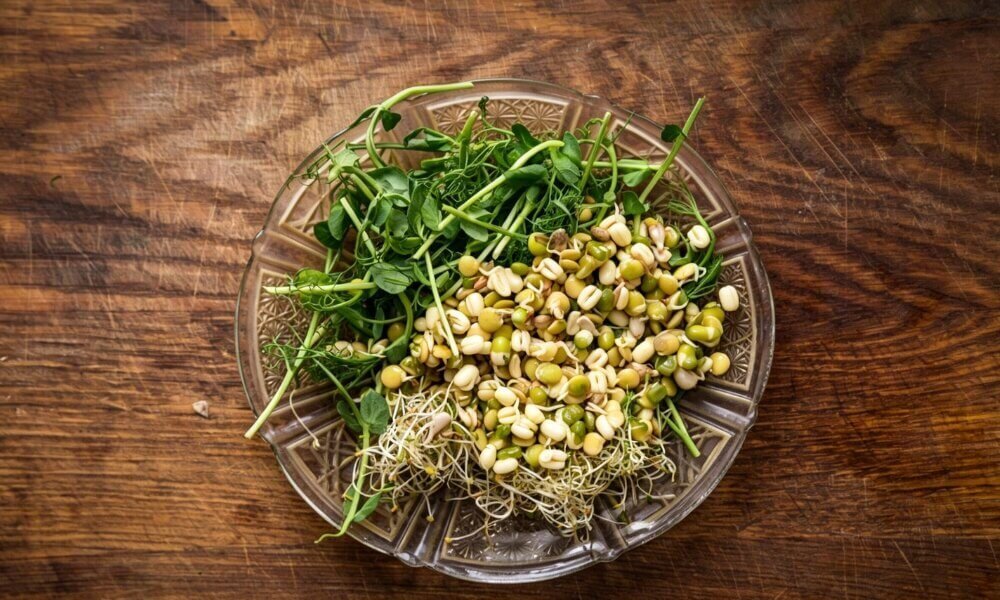
Main Differences Between Sprouts and Microgreens
Although both come from germinated seeds, they are quite different in how they are grown and harvested.
| Feature | Sprouts | Hydroponic Microgreens |
|---|---|---|
| Growing Method | Water only, no light required | Grown with light and growing media |
| Harvest Time | 2–5 days | 7–14 days |
| Plant Part Eaten | Whole plant | Stems and leaves only |
| Growing Medium | None | Mats or substrates |
| Growing Environment | Simple container setup | Controlled indoor system |
| Flavor | Mild and soft | Stronger and more developed |
Which One Is Better for Indoor Growing?
Both sprouts and hydroponic microgreens can be grown indoors, but they serve different purposes and offer very different growing experiences.
Sprouts are usually the simplest option for beginners because they grow quickly and require very little equipment. Microgreens, on the other hand, take slightly more time and care, but they provide larger harvests, stronger flavors, and a wider variety of culinary uses.
If you are deciding which one is better for your home, lifestyle, or indoor growing setup, it is helpful to compare how they differ in terms of growing method, maintenance, harvest time, nutrition, and everyday use in the kitchen.
| Feature | Sprouts | Hydroponic Microgreens |
|---|---|---|
| Ease of Growing | Very easy, beginner-friendly | Moderate, requires simple setup |
| Equipment Needed | Minimal (jar or tray) | Growing mats, trays, or hydroponic system |
| Growing Time | Extremely fast (2–5 days) | Fast (7–14 days) |
| Space Requirement | Very small kitchen space | Small to medium indoor setup |
| Maintenance | Simple rinsing routine | Light, water, and moisture control |
| Cleanliness | High risk of excess moisture buildup | Cleaner and more controlled environment |
| Best For | Home use, quick nutrition | Indoor farming, restaurants, commercial use |
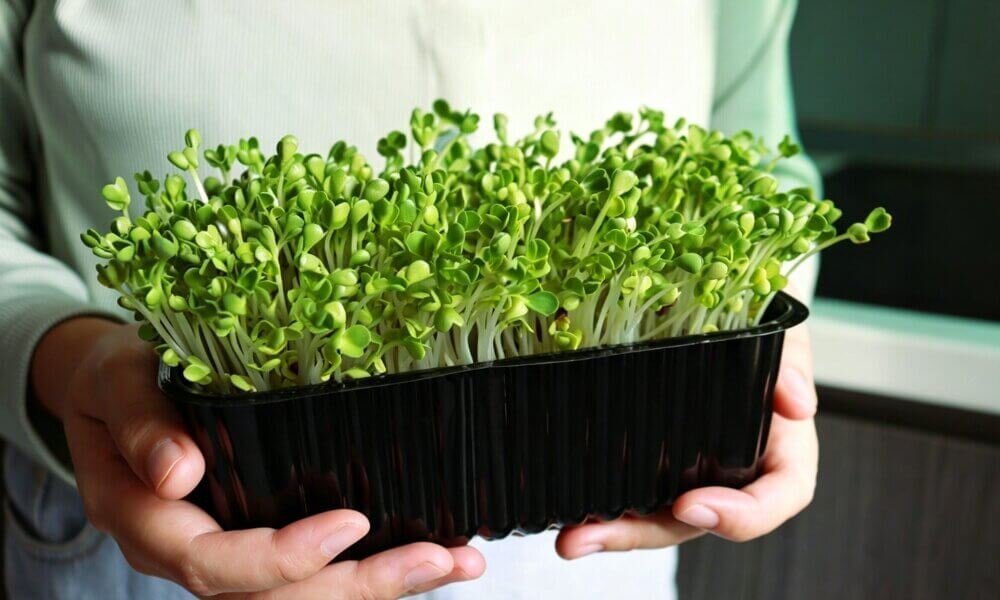
Why Grow Microgreens Hydroponically?
Short Harvest Times for Indoor Hydroponic Microgreens
One of the reasons hydroponic microgreens are so popular is their fast harvest time. Most varieties can be ready to harvest within 7 to 14 days after germination, which allows growers to enjoy fresh greens much sooner than traditional vegetables. Because they grow so quickly, it is possible to produce multiple harvests within a single month.
Growing microgreens indoors also makes year round production much easier. By controlling lighting, temperature, and moisture levels, growers can continue producing fresh crops regardless of outdoor weather or seasonal changes. This makes hydroponic microgreens a great option for home gardeners, restaurants, schools, and indoor farms that want a steady supply of fresh produce.
Cleaner Soil-Free Growing for Indoor Farming Environments
Hydroponic microgreens are grown without traditional soil, creating a much cleaner indoor gardening experience. Without loose soil, growers do not have to deal with as much dirt, mud, or dust, which makes indoor maintenance easier and more convenient.
This is one reason hydroponic systems work well in places like kitchens, apartments, classrooms, restaurants, and indoor growing rooms. Growing media such as hemp mats or coco coir also help keep the growing area organized and reduce mess during watering and harvesting. For many people, hydroponic microgreens offer a cleaner and simpler way to grow fresh food indoors.
Water-Saving Hydroponic Gardening Methods for Sustainable Growing
Hydroponic microgreens are often considered a more water efficient way to grow fresh produce. Instead of soaking large amounts of soil, water is supplied directly to the roots and growing media, helping reduce unnecessary water waste from evaporation or runoff.
Since microgreens are harvested at an early stage and have relatively small root systems, they usually require much less water than fully grown vegetables. This makes them a practical choice for growers who want to reduce water usage while still maintaining healthy plant growth indoors.
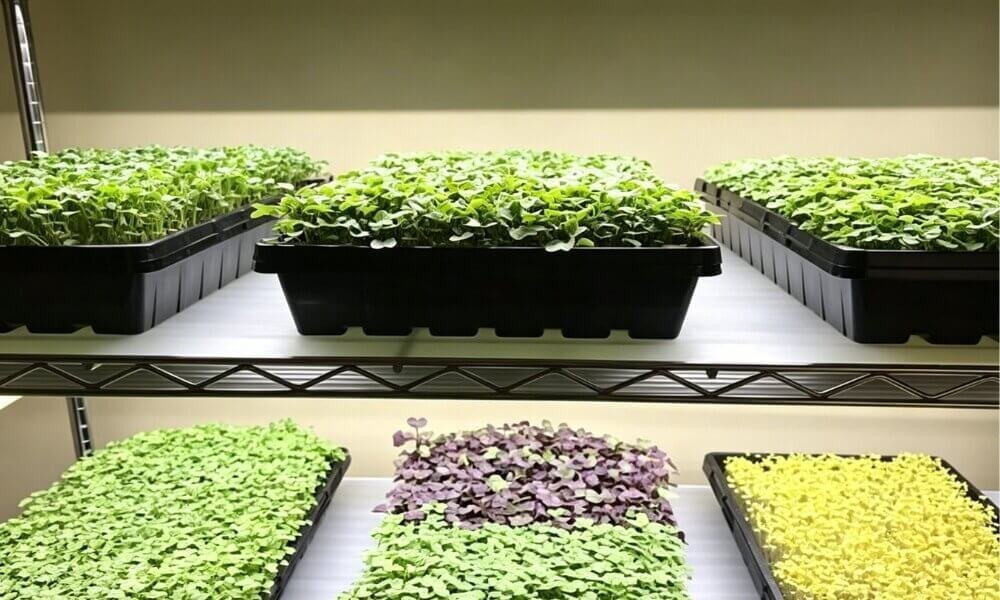
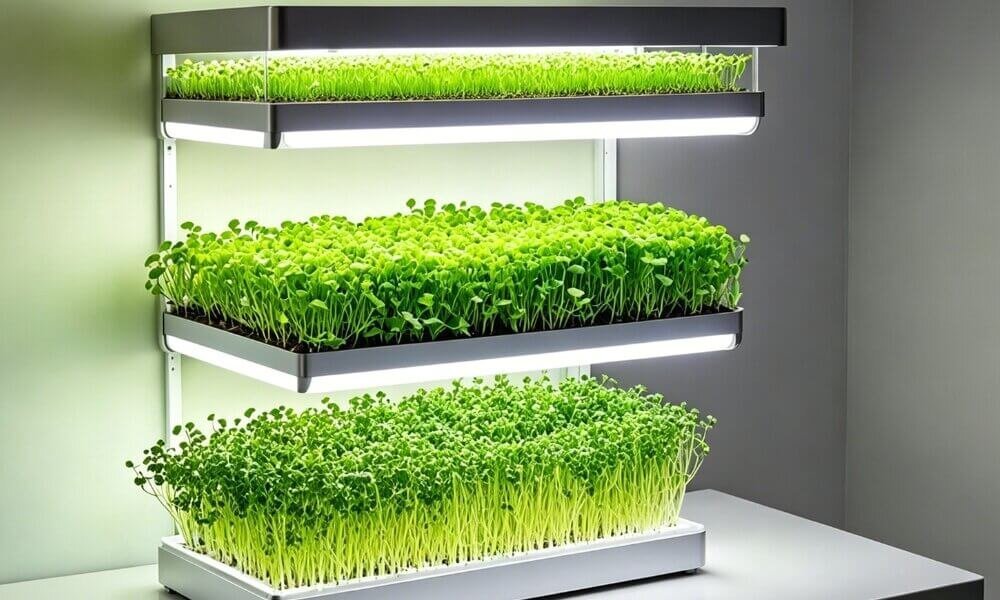
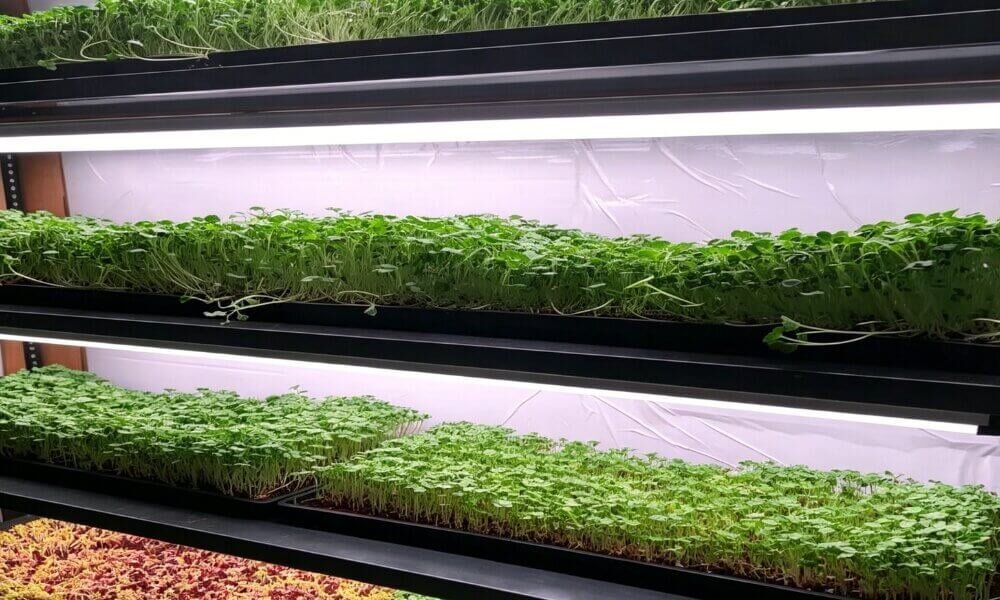
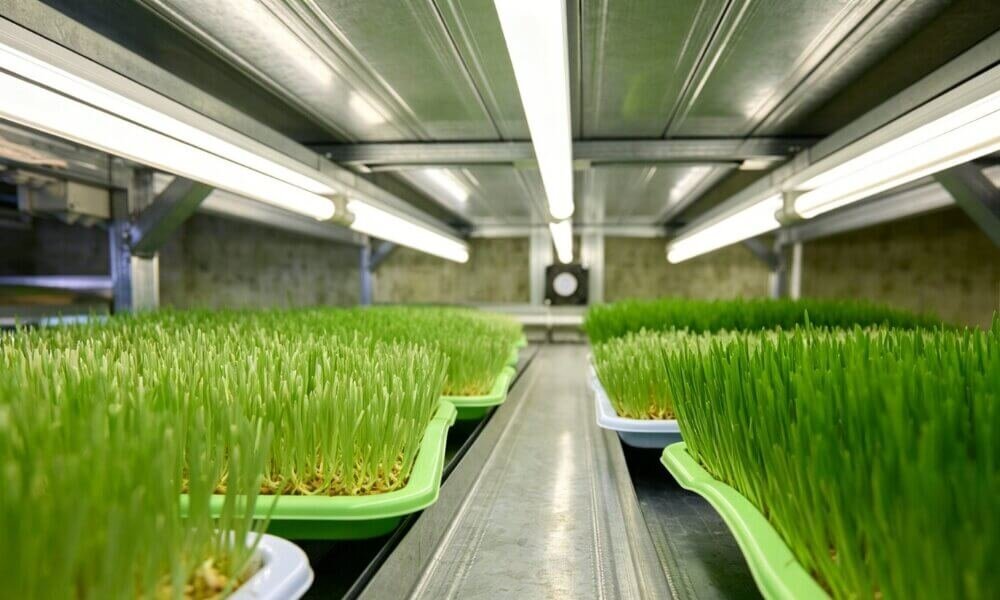
Vertical Indoor Farming Systems for Small Spaces and Urban Gardening
One major advantage of hydroponic microgreens is that they can be grown successfully in small indoor spaces. Many growers use vertical farming systems such as stacked shelves or hydroponic towers to maximize production without needing a large growing area.
This approach works especially well in apartments, classrooms, restaurants, urban farms, and commercial indoor growing facilities where space is limited. Vertical systems also make it easier to organize lighting, watering, and airflow, helping growers manage their indoor gardens more efficiently.
Best Microgreens for Beginners (Easy to Grow at Home)
Best Microgreens for Beginners (Easy to Grow at Home)
Some microgreens are easier to grow than others, making them ideal choices for beginners who are new to hydroponic gardening. The best beginner-friendly microgreens usually germinate quickly, grow consistently, and require minimal maintenance during the growing cycle.
If you are still not sure what to grow, you can start with some beginner-friendly hydroponic plants that are easier to succeed with.
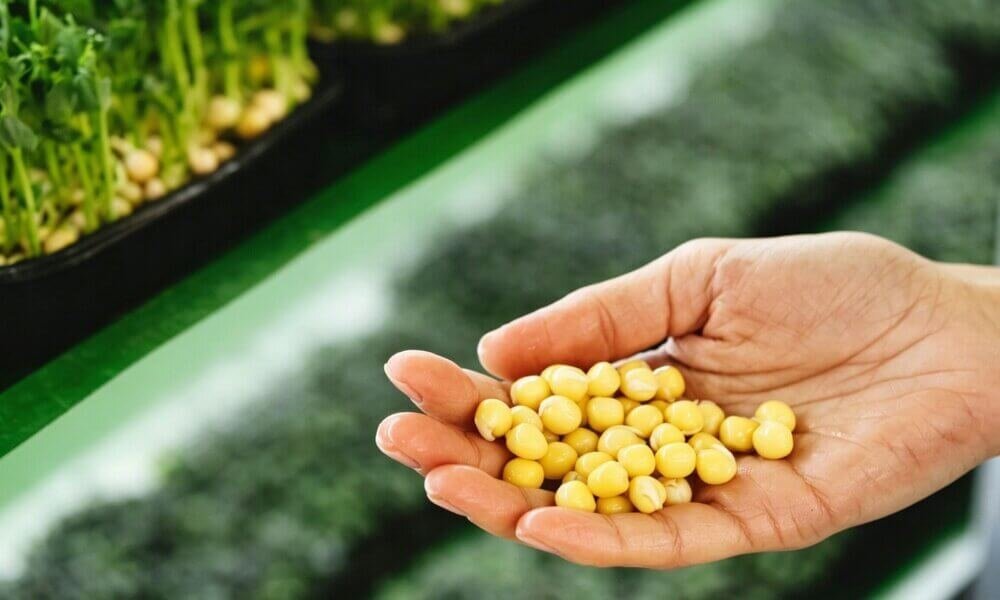
1. Radish microgreens (fast germination, strong flavor)

Radish microgreens are one of the easiest and fastest crops to grow, especially for beginners. Under the right conditions, they usually start sprouting within just 1 to 2 days, and are often ready to harvest in about 7 to 10 days. This quick turnaround is one of the main reasons they are so popular in both home and commercial growing.
They also grow very reliably. Even with a simple setup, radish microgreens tend to come out healthy and uniform. You’ll often see bright green stems, and depending on the variety, sometimes even purple tones. This makes them very attractive for restaurants and retail presentation.
The flavor is quite strong, with a spicy, peppery taste that really stands out in dishes. Because they are fast, easy, and consistent, many beginners start with radish microgreens, while experienced growers often use them as a stable crop for daily production.
2. Broccoli microgreens (nutrient-rich and beginner-friendly)
Broccoli microgreens are popular mainly because they are mild, nutritious, and very easy to add into everyday meals. They usually germinate in about 2 to 3 days and grow steadily without requiring anything complicated.
Compared to stronger varieties like radish, broccoli has a much softer and slightly earthy taste. Because of this, it blends easily into salads, sandwiches, smoothies, and even juices without changing the overall flavor too much. Many people choose it more for its nutritional value than its taste.
From a growing perspective, broccoli microgreens are very beginner friendly. They don’t need special conditions and are quite forgiving during the growing process. Since demand is stable and production is simple, many growers see them as a safe and reliable crop.
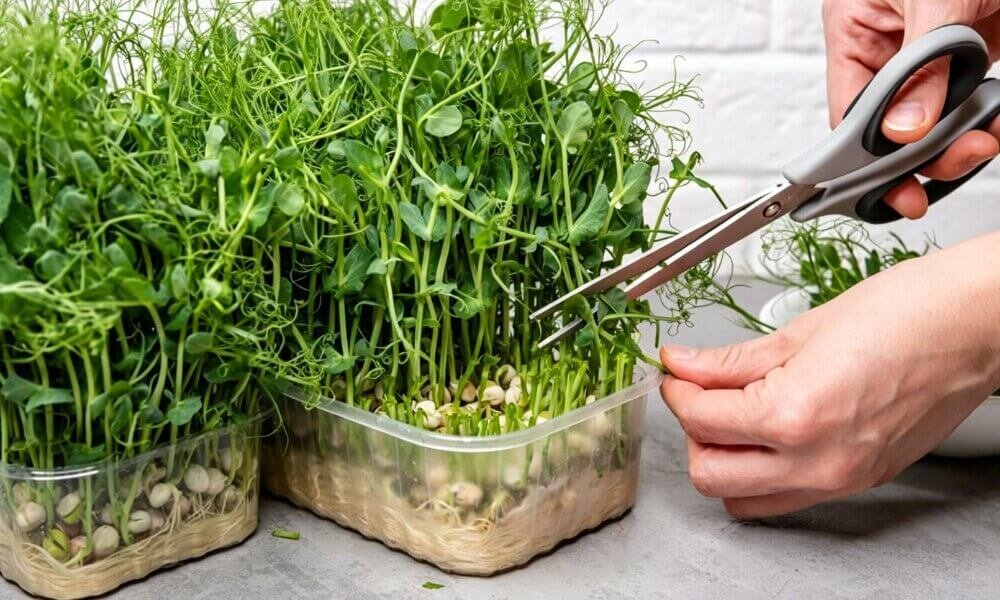
3. Pea shoots (high yield and easy indoor growth)
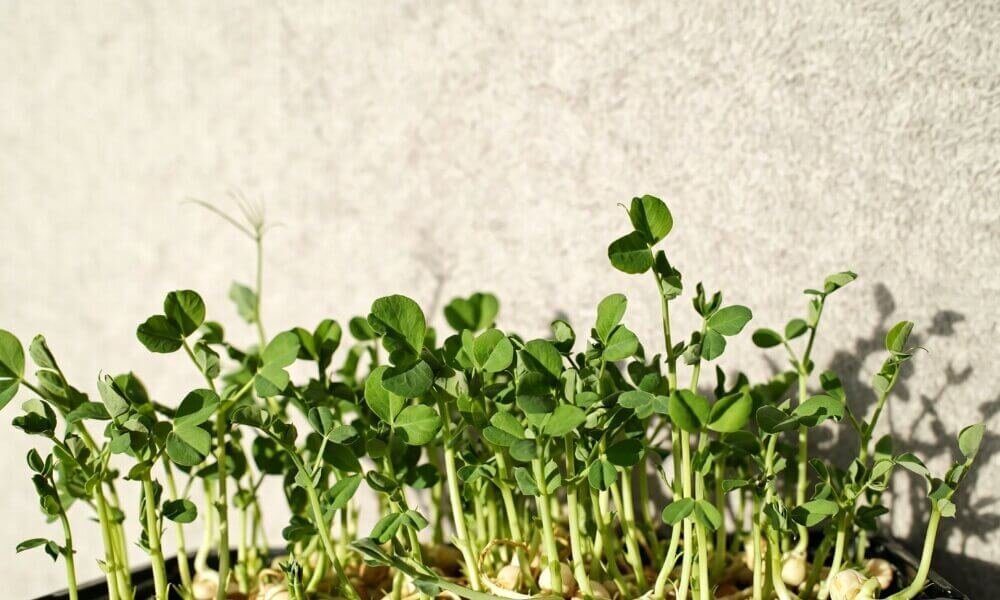
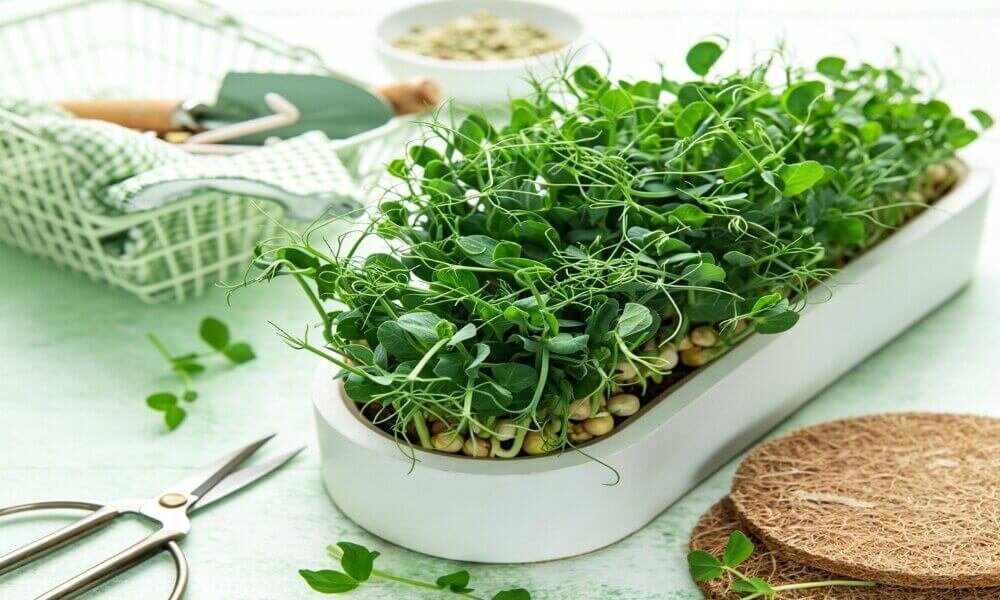
Pea shoots are known for their naturally sweet and fresh flavor, and they usually give a very high yield per tray, which makes them especially satisfying to grow. They may take a little longer to get started compared to radish, but once they begin growing, they develop quickly and strongly.
Most growers harvest them in about 10 to 14 days. The texture is crisp but still tender, with a light pea-like sweetness that makes them very versatile for both raw dishes and cooked meals.
In restaurants, pea shoots are especially popular because they look full, fresh, and visually appealing on the plate, adding both volume and a clean green aesthetic.
Fast Growing Microgreens With Short Harvest Cycles
Fast growing microgreens are ideal for growers who want quick harvests and continuous production cycles. These varieties usually germinate rapidly and reach harvest size within a short period of time, making them suitable for both home growing and commercial production.
1. Mustard microgreens (rapid growth, spicy flavor)
Mustard microgreens grow really fast, which is why so many growers like them. They usually sprout quickly and are ready in a short time, so the whole growing cycle is quite efficient. One of the most interesting things about them is the flavor. At the beginning they are quite mild, but as they grow, the taste quickly becomes sharp, spicy, and peppery, and this stronger flavor is exactly what makes them popular.
In terms of appearance, the leaves are usually bright green and look clean and fresh. Some varieties even develop slightly curled or frilly edges, which makes them look more interesting on the plate. Because of this strong flavor and nice presentation, chefs often use them when they want to add a bit of heat or a “kick” to simple dishes like salads, sandwiches, or plated meals.
From a growing perspective, mustard microgreens are very practical. They are fast, easy to manage, and fit perfectly into short harvest cycles. This is why many growers choose them when they want quick turnover and strong flavor output.
2. Kale microgreens (resilient and stable growth)

Kale microgreens are well known for being reliable and easy to handle. They might not be the fastest-growing option, but they make up for it with steady and consistent performance, which is why many growers include them as a core crop.
They usually germinate within 2 to 3 days, and depending on the conditions, they are ready to harvest in about 8 to 12 days. The flavor stays mild, slightly earthy, and not overpowering, which makes them very flexible in daily use.
Because of this gentle taste, people often add kale microgreens to smoothies, salads, or juices without changing the overall flavor too much. For growers, they are popular simply because they are predictable, stable, and always have consistent demand from health-conscious customers.
3. Arugula microgreens (fast sprouting and strong taste)

Arugula microgreens are especially known for their bold, peppery flavor. They sprout quickly, and even at an early stage, you can already notice their strong taste developing.
The leaves themselves are soft and light green, with a more delicate appearance compared to thicker varieties like sunflower or pea shoots. But even though they look gentle, the flavor is quite strong and slightly spicy, which often surprises people the first time they try them.
In cooking, arugula microgreens are commonly used in salads, on pizza, or mixed into pasta and other dishes as a finishing touch. Because the flavor is so strong, you only need a small amount to make an impact. For growers, this makes them a great option if you want something fast-growing with clear demand in restaurant and gourmet use.
Most Profitable Microgreens for Small Farms and Businesses
Certain microgreens are especially popular in restaurants, farmers markets, and commercial indoor farms because of their strong market demand, attractive appearance, and high production value. Fast growth cycles and high yields can also improve profitability for growers.
1. Sunflower microgreens (high yield and popular demand)
Sunflower microgreens are widely considered one of the most reliable crops in the microgreens market. They are popular mainly because of their texture and flavor. The stems are thick, juicy, and crisp, with a slightly nutty and mildly sweet taste that makes them very enjoyable to eat. They also hold up well after harvest, which makes them suitable for storage, transport, and commercial use.
In food applications, sunflower microgreens are commonly used in salads, sandwiches, and healthy meal prep dishes. They are also often added as a garnish because they give dishes a fresh and full appearance.
From a growing perspective, sunflower microgreens produce a relatively high yield compared to many other varieties. This makes them attractive for growers who want stable production and consistent sales. Their strong visual appeal and reliable output also make them a common core crop in commercial microgreens production.
2. Basil microgreens (premium culinary herb microgreens)
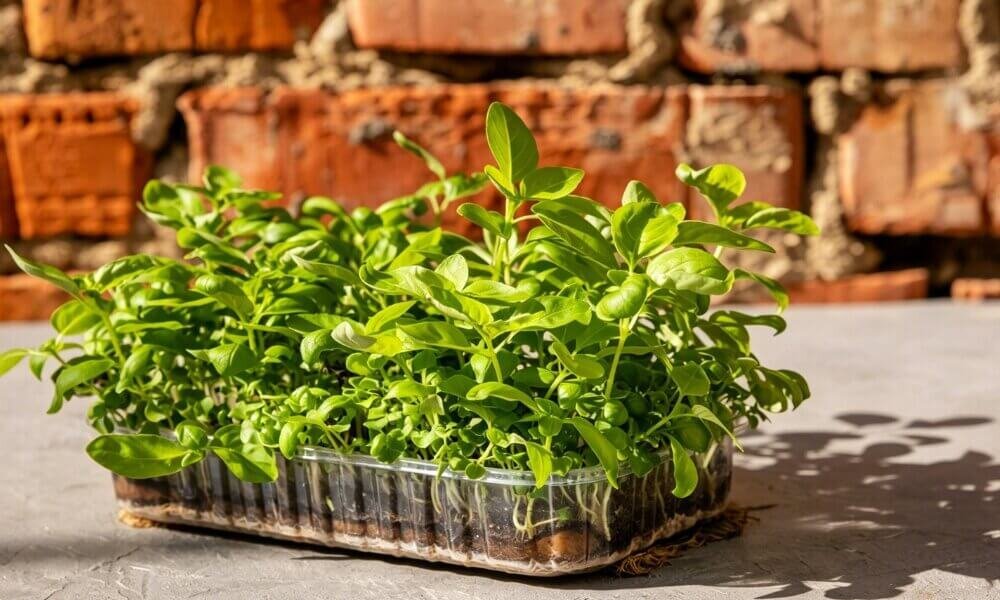
Basil microgreens are considered a premium herb in the microgreens category because of their strong aroma and distinct flavor. Even in small amounts, they can significantly enhance the taste of dishes. They are especially popular in Italian cuisine and high end restaurants where fresh herbs are an important part of the menu.
Compared to faster and easier crops, basil microgreens are slightly more sensitive during growth. They require more stable conditions, especially in terms of humidity, airflow, and lighting. Because of this, they need more attention during production.
However, many growers still choose basil microgreens because they have strong market demand and higher selling value per tray. In practice, they are often treated as a high margin crop rather than a high volume crop. This makes them a valuable part of a diversified microgreens production system.
3. Radish microgreens (fast production cycle and consistent sales)
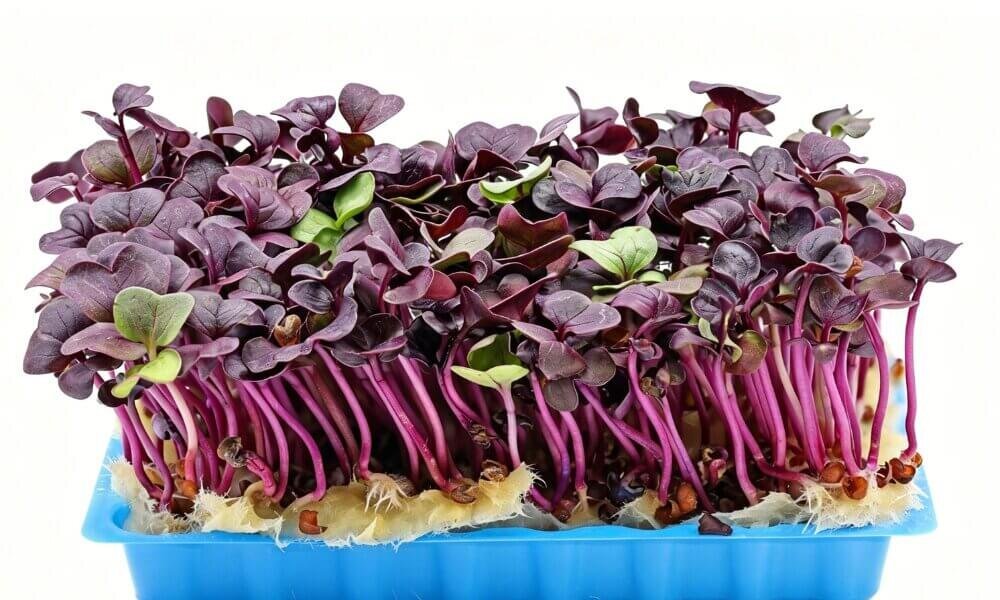
Radish microgreens are one of the most popular choices for both beginners and commercial growers. Their biggest advantage is their fast growth cycle. They germinate quickly, grow strongly, and are usually ready for harvest in a very short time, which allows for efficient production cycles.
They are also very marketable because of their bright appearance and bold flavor. The stems can range from green to deep purple, and the taste is spicy and slightly peppery, which adds a strong flavor contrast in dishes. They are commonly used in salads, poke bowls, and modern fusion cuisine.
Because radish microgreens are easy to grow and consistent in performance, they are often used as a foundation crop in commercial planning. They help maintain steady production and reliable cash flow while allowing growers to experiment with more sensitive or premium varieties.
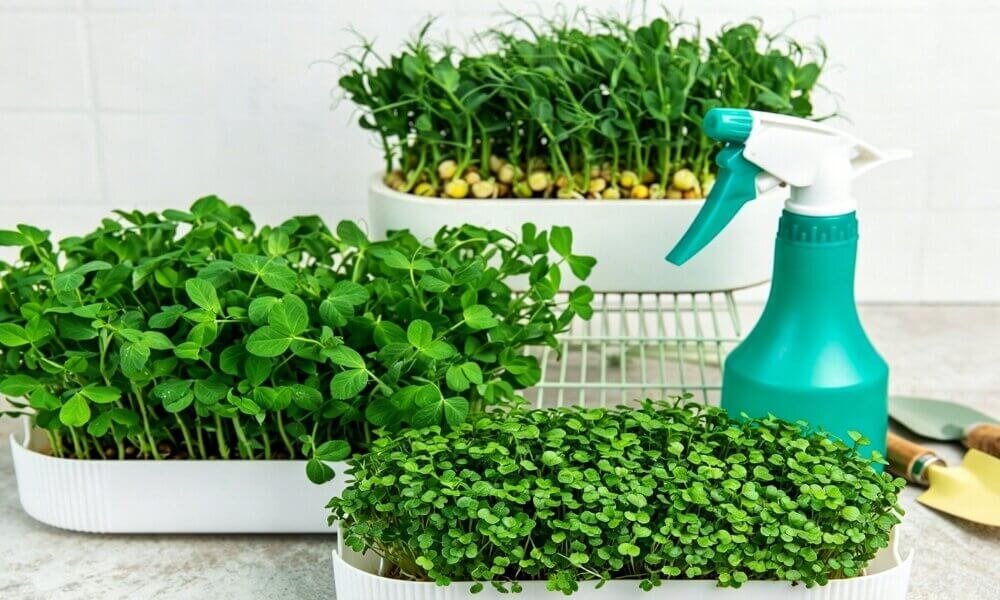
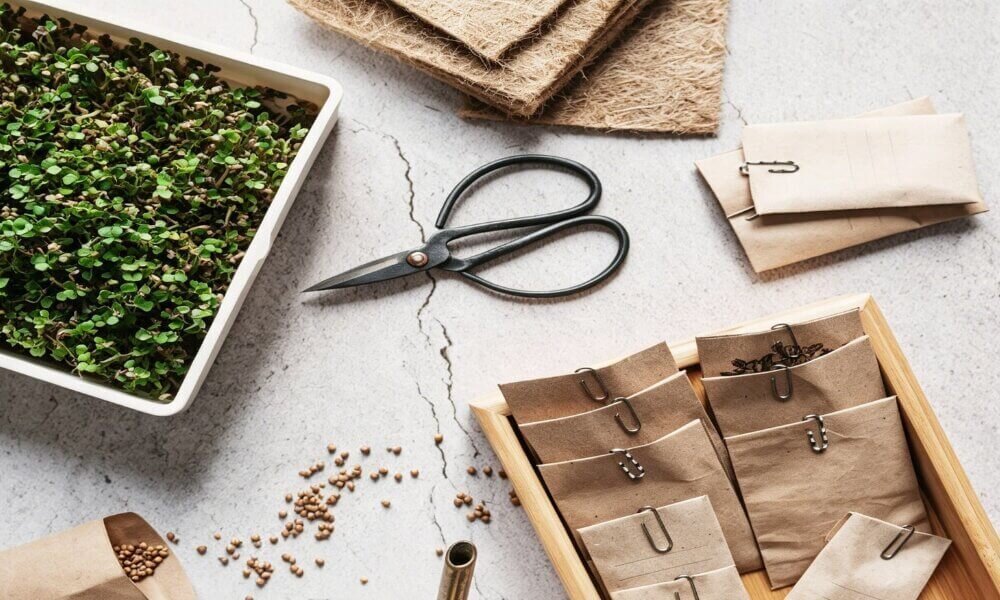
Basic Indoor Farming Equipment for Microgreens Production
Seedling Trays for Hydroponic Microgreens Systems
Growing trays are honestly one of those things that looks simple, but makes a big difference in microgreens growing. Most people just use shallow trays, mainly because they are easy to handle and make it much simpler to spread seeds evenly.
In real setups, you usually end up using two layers. One tray is for holding water or the growing mat, and the other one is a drainage tray underneath. That bottom tray matters more than people think, because it keeps excess water away and helps avoid problems like root rot. A lot of growers also prefer reusable trays, just because they are more practical in the long run and reduce cost.
Soilless Growing Media for Indoor Hydroponic Gardening
Growing media is basically what replaces soil in hydroponics. Its job is simple, but important. It needs to hold the seeds in place, keep enough moisture for germination, and still allow air to move through the roots.
The tricky part is balance. If it stays too wet, things go wrong quickly. If it dries out too fast, germination becomes uneven. So most growers just look for something that sits in the middle and is stable enough to stay consistent from start to finish.
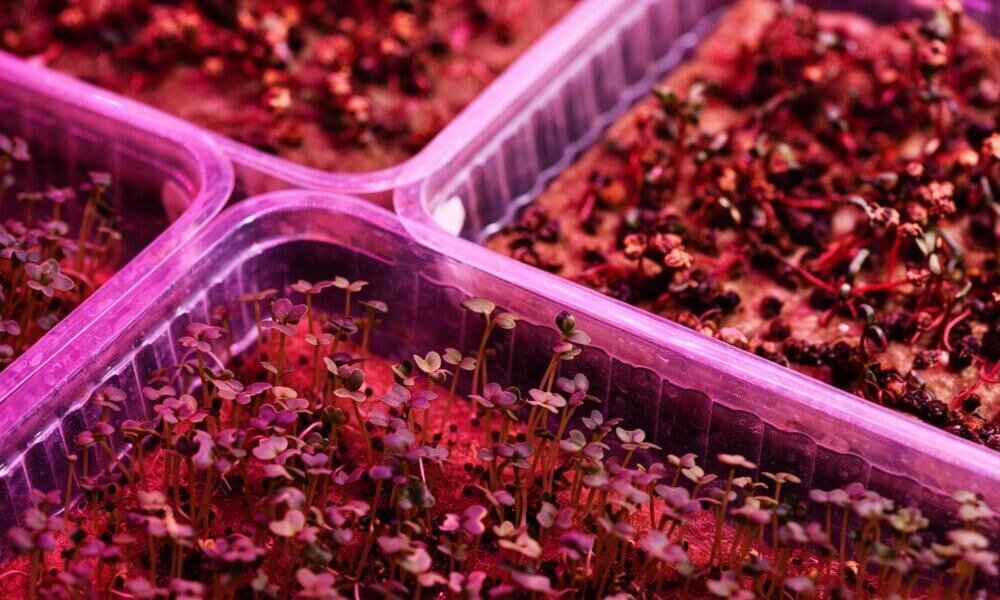
Full Spectrum LED Lighting for Indoor Plant Growth
Lighting is probably the most important part of indoor growing, especially for microgreens. If the light is not stable, the growth will never be consistent, no matter how good everything else is.
That is why LED grow lights are used almost everywhere now. Full spectrum ones are especially common because they feel closer to natural sunlight, and plants just respond better to that kind of balanced light.
Another practical reason is cost. LED lights can run for long hours without using too much electricity, so you can actually keep a full indoor setup running every day without it becoming too expensive. That is why you see them in home setups, schools, restaurants, and even small commercial farms.
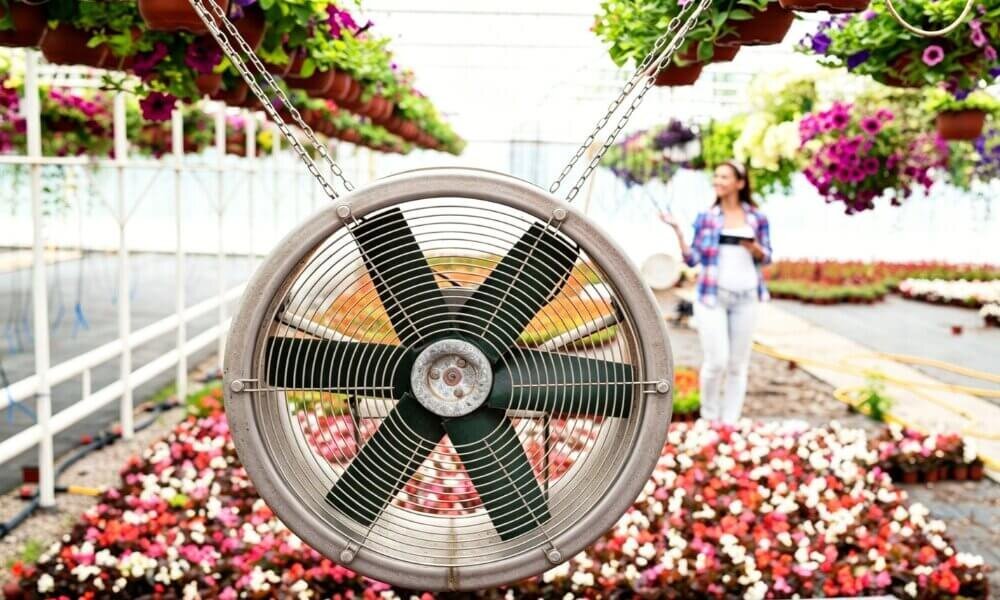
Proper Air Circulation for Healthy Microgreens Growth
Airflow is one of those things people ignore at the beginning, but later realize it is essential. Without good air movement, humidity builds up fast, and that is when mold problems usually start.
You do not need anything complicated here. Most growers just use a small fan running gently in the growing area. The goal is not strong wind, just steady movement of air so the surface of the plants does not stay too wet.
Once airflow is stable, everything else becomes easier to manage. Plants grow stronger, and the whole environment feels more controlled.
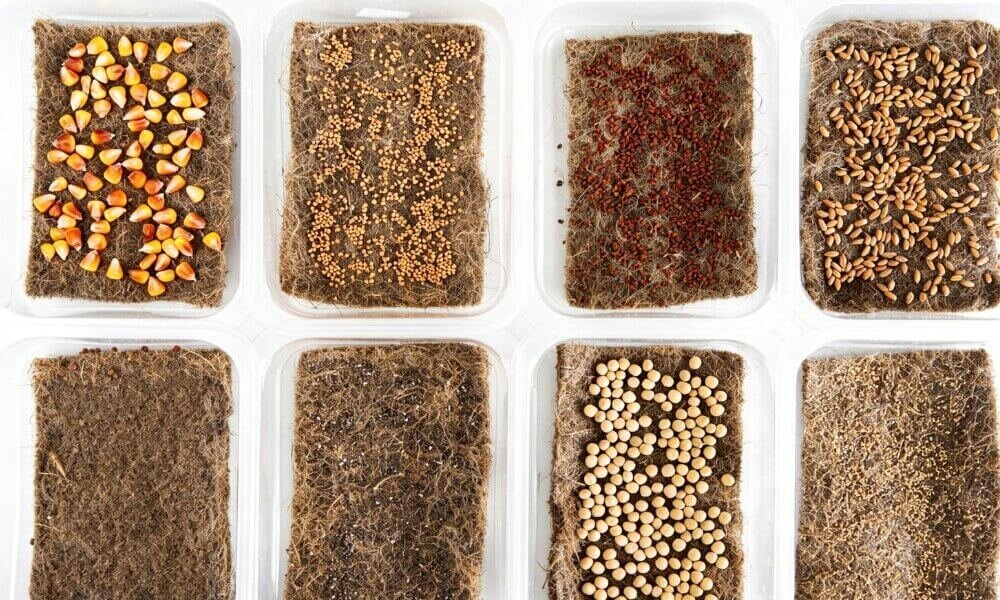
Comparing Popular Soilless Media for Hydroponic Growing
The growing medium is actually a really big deal in hydroponic microgreen growing. It affects how well seeds stay moist, how roots spread, and basically how smooth the whole grow feels from start to finish. Since there is no soil, the medium kind of becomes the base of everything. And in real growing, you can definitely notice differences between materials when it comes to consistency and yield.
Hemp Mats: Sustainable Growing Mats for Seed Germination

Hemp mats are usually picked by growers who want something simple and clean. They hold moisture pretty well but still let enough air through, so the roots don’t feel suffocated. That balance is actually why a lot of people like them.
They are also biodegradable, which is a nice bonus if you care about sustainability. In practice, they are very easy to use. Just put them in the tray, wet them, and you are basically ready to go. That’s why you’ll see them in both small home setups and bigger commercial farms.
The downside is mostly cost. They are not the cheapest option, and you usually just use them once. Also, if the air is dry, they can dry out faster than you expect, so you do need to keep an eye on moisture.
Coco Coir:Moisture-Retaining Medium for Indoor Agriculture Systems
Coco coir is probably one of the most commonly used options out there. The main reason is simple, it holds water really well. That makes the early growing stage a lot more stable, especially if you don’t want to water all the time.
People also like it because it’s basically a byproduct from coconuts, so it feels more natural and sustainable. Plus, it’s easy to find in most places, which makes it very practical.
From what I’ve seen, it’s also quite forgiving. Even if you are not super precise with watering, it still performs fine as long as you don’t overdo it.
Rockwool:Professional Hydroponic Medium for Controlled Root Development
Rockwool is more of a commercial grower choice. The main reason is consistency. It gives a very stable environment for the roots, so everything grows more evenly, which is important when you are producing at scale.
The only thing you really have to do before using it is soak it in pH balanced water. It’s not something you can just use straight out of the bag. Once you prep it properly, it becomes very reliable.
Most commercial growers use it because it’s predictable. It’s not the simplest option, but when you are growing in large volume, stability matters more than convenience.
Choosing the Right Hydroponic Medium for Microgreens Production
The best growing medium really depends on what you are trying to do, how much experience you have, and of course your budget. In general, beginners usually go for hemp mats or coco coir because they are simple to handle and much more forgiving if you are still learning. On the other hand, commercial growers often lean toward rockwool because it gives more consistency and works better for scaling production.
Here is a simple comparison to make it easier to understand:
| Factor | Hemp Mats | Coco Coir | Rockwool |
|---|---|---|---|
| Water Retention | Good | Very good | Very good |
| Reusability | Low | Medium | Low |
| Cost | Medium to high | Low to medium | Low |
| Beginner friendliness | Very high | High | Medium |
| Commercial suitability | High | Medium | Very high |
If you look at it in a practical way, hemp mats are more about convenience and clean setup, coco coir is more about balance and flexibility, and rockwool is more about control and scale. None of them is “perfect”, it just depends on what stage you are at and what kind of system you are building.
Complete Indoor Microgreens Growing Guide for Beginners
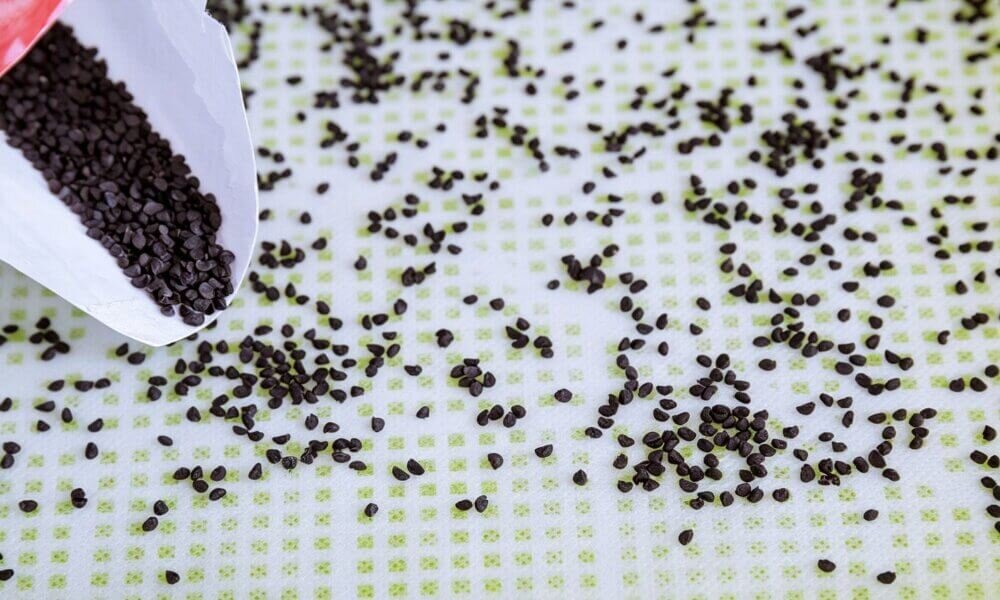
Step 1: Choosing the right seeds is where everything really starts
When I look at successful microgreens production, I always end up coming back to one thing first, and that is the seeds, because no matter how good your lighting or setup is, everything still depends on whether the seeds are consistent enough to give you a clean and even start.
Over time, I’ve realized that experienced growers don’t really chase complex setups first. They focus on seeds that germinate reliably and do it together, because when germination is uneven, the whole tray already feels harder to manage from the beginning.
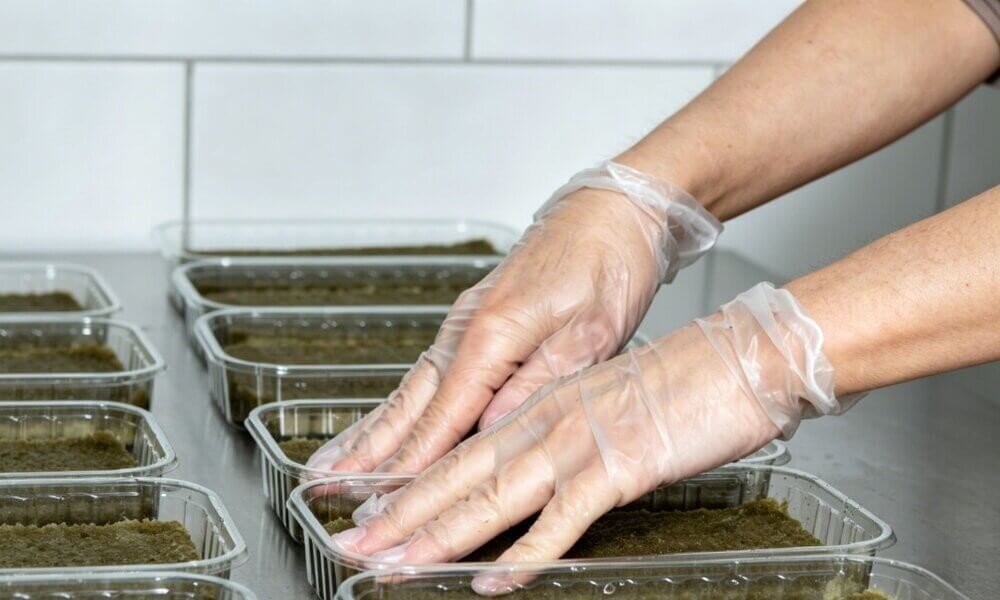
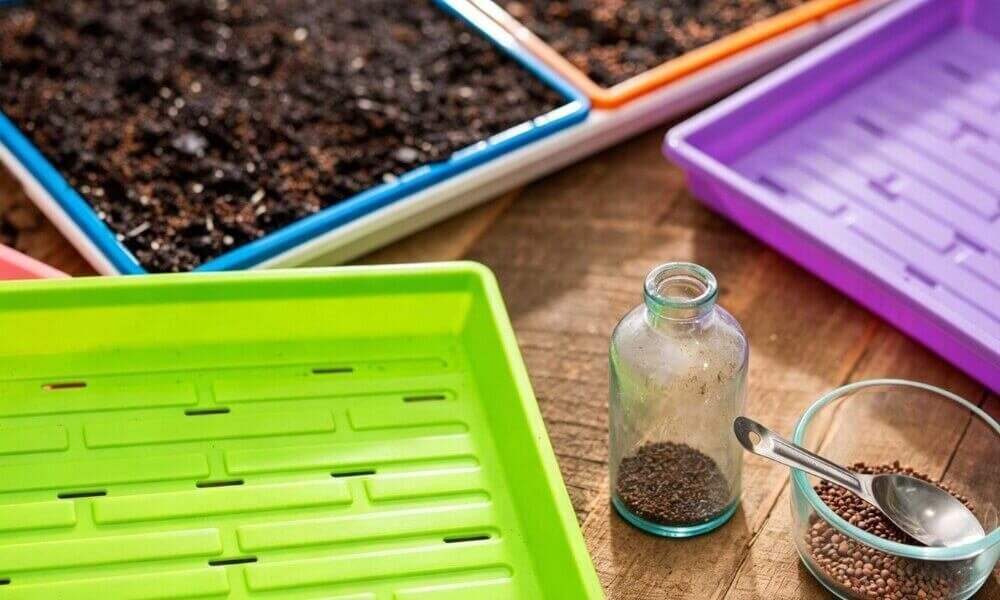
Step 2: Clean trays and properly prepared media set the tone for the whole cycle
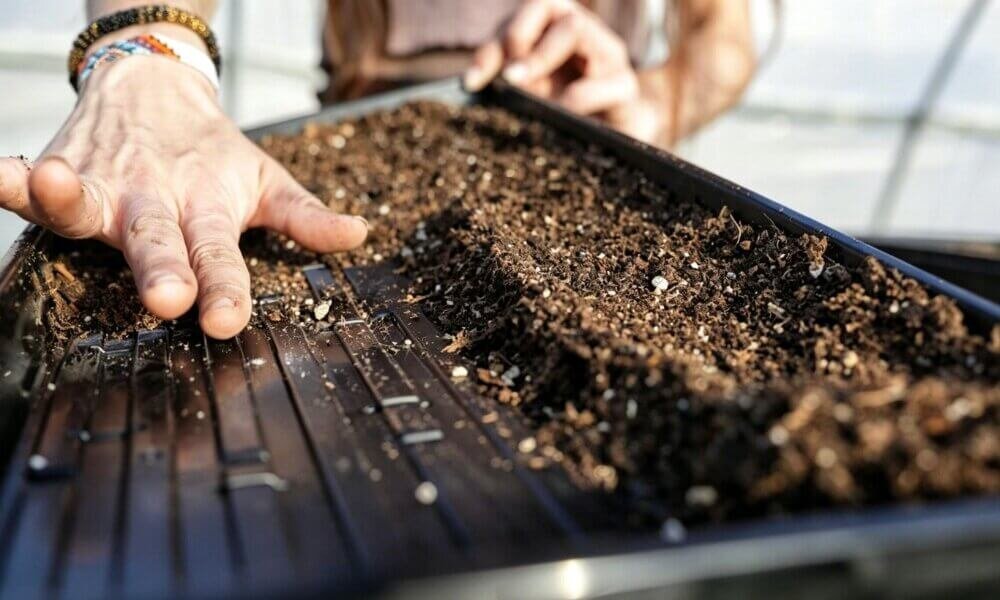
Before anything goes into the tray, I always make sure it is properly cleaned, not just rinsed quickly, but fully reset, because even a thin layer of residue or leftover moisture can quietly turn into mold once humidity builds up.
After that, I focus on the growing medium, whether it’s hemp mats, coco coir, or rockwool, and what really matters here is balance. I always pre-wet it until it feels evenly moist, but never to the point where water is pooling or dripping, because once it becomes too wet, problems usually show up later when it’s already harder to fix.
Step 3: Seed density is more about feel than math
When it comes to spreading seeds, most people either go too dense or too light, usually because they’re trying to follow instructions instead of reading the surface.
What works best in practice is a layer where the seeds fully cover the area but still sit naturally without stacking on top of each other, so it looks full but still breathable at the same time.
After a few cycles, you stop thinking in numbers and start judging it visually, and that’s usually when consistency starts to improve.
Step 4: Darkness at the beginning helps everything grow in sync
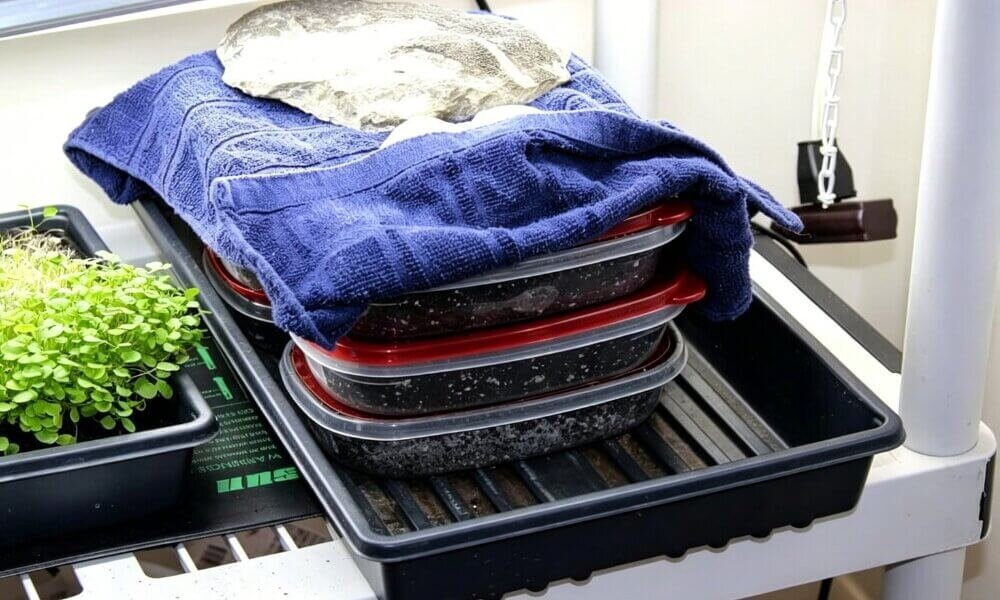
Right after sowing, I never rush to turn on the lights because the early stage is not really about growth yet, it’s more about synchronization.
I usually cover or stack the trays so they stay in complete darkness with stable humidity, and even though it looks like nothing is happening, this is actually when the seeds are aligning their germination so that they all come up more evenly later.
That’s also why trays with proper blackout tend to look more uniform once they finally emerge.
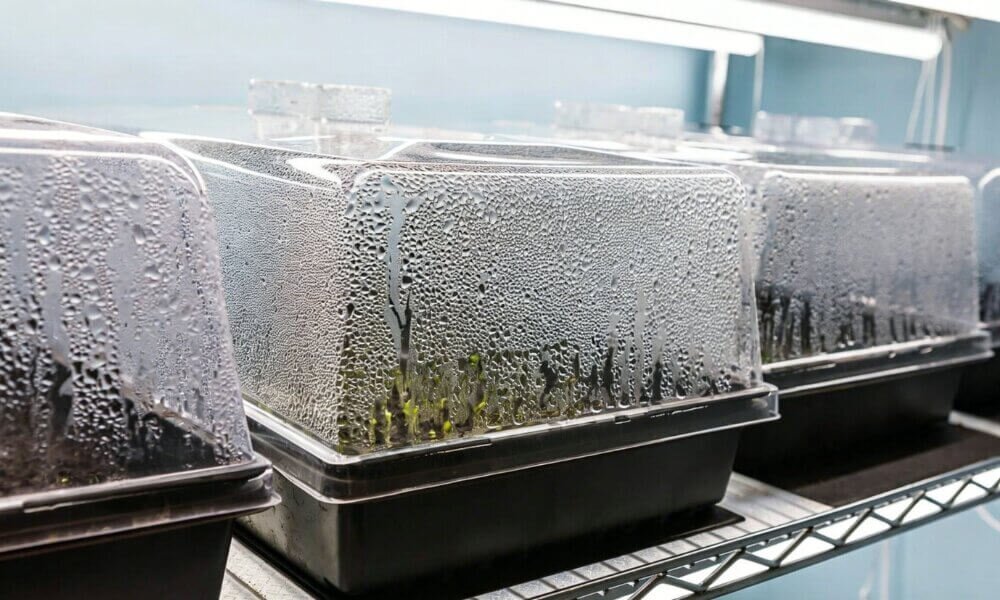
Step 5: Light is not just growth, it is structure
Once the sprouts start coming up, light becomes one of the most important factors, not just for growth, but for how the plants physically develop.
If the light is too weak or too far, the plants will stretch and look thin as they reach upward, but if it is too strong or too close, they can dry out or show stress very quickly.
What I have found works best is not constant adjustment, but stability, keeping the same height, the same duration, and only making small changes when the plants clearly respond to it. A stable lighting setup such as a fixed LED grow light positioned at an optimal distance can help maintain uniform growth without frequent readjustment.
And if you often find it difficult to manage lighting consistency manually, or you simply want a more beginner friendly setup that handles both lighting and hydroponic growing in a more integrated way, it may be worth taking a look at a more complete microgreens growing system.

Greenfuturehydro Classroom & Kitchen Hydroponic Garden System for Herbs and Greens
Step 6: Water management is where most beginners go wrong

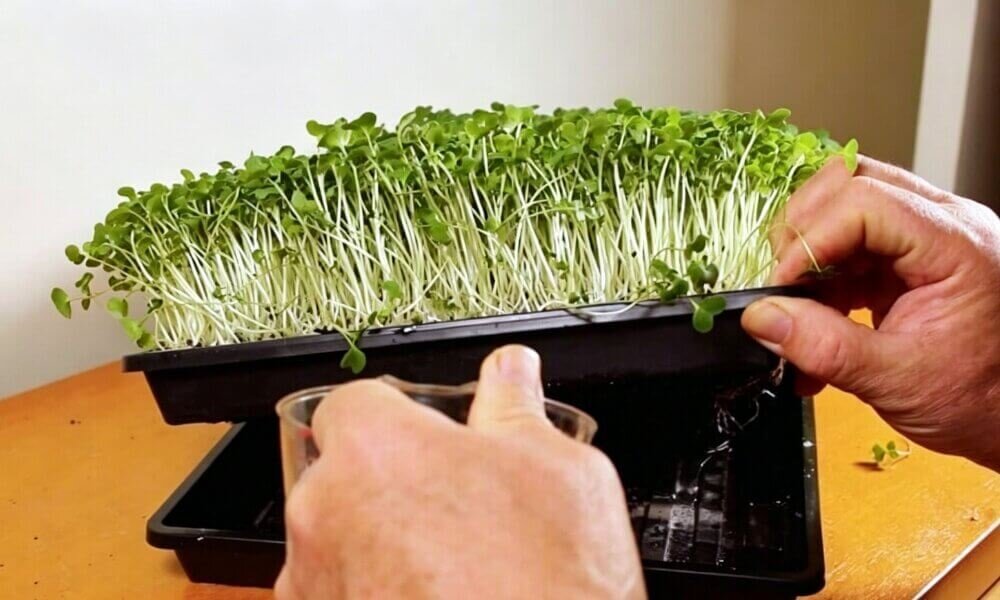
Most growing issues don’t come from lack of water, but from too much of it, especially indoors where humidity builds up faster than people expect.
That’s why I prefer bottom watering, because it keeps the surface clean and allows the roots to grow downward naturally instead of dealing with excess moisture on top.
I usually just watch the surface closely, and the moment it starts looking overly shiny or sealed with water, that’s usually the first sign that it’s already too wet.
Step 7: Airflow is the silent factor people underestimate
Air movement is something people often ignore until they see the difference it makes.
Without airflow, humidity tends to sit in small pockets around the tray, and that’s exactly where mold problems begin, even if everything else looks fine.
A small fan is usually enough, nothing strong, just gentle movement, and over time you can actually see the difference in plant strength and overall cleanliness of the tray.
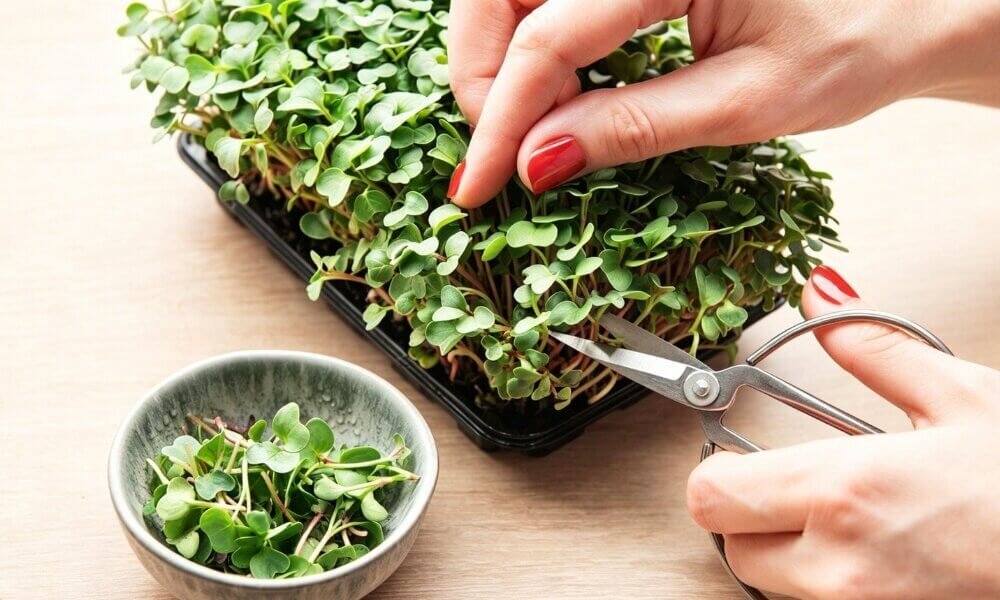
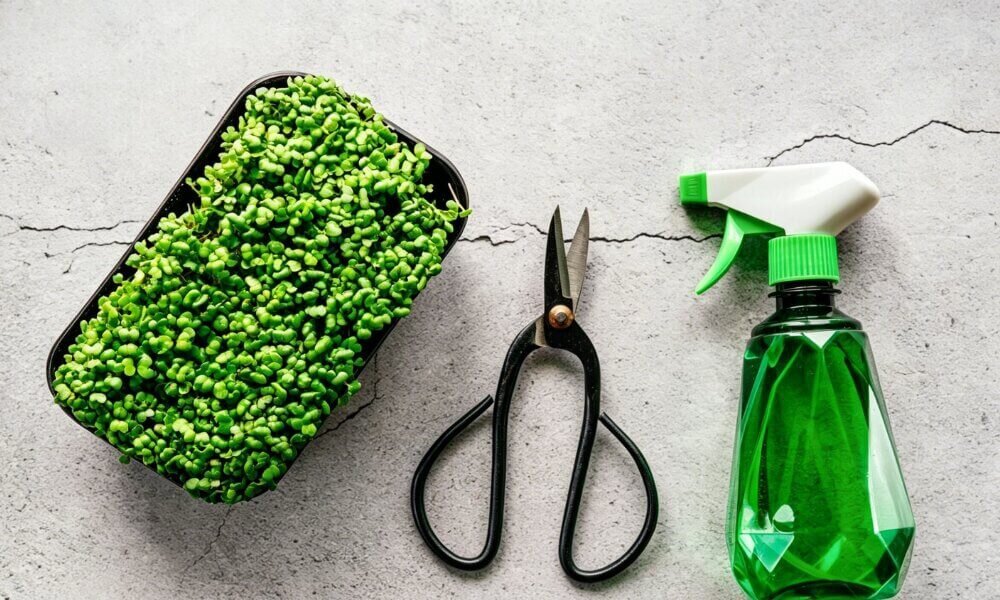
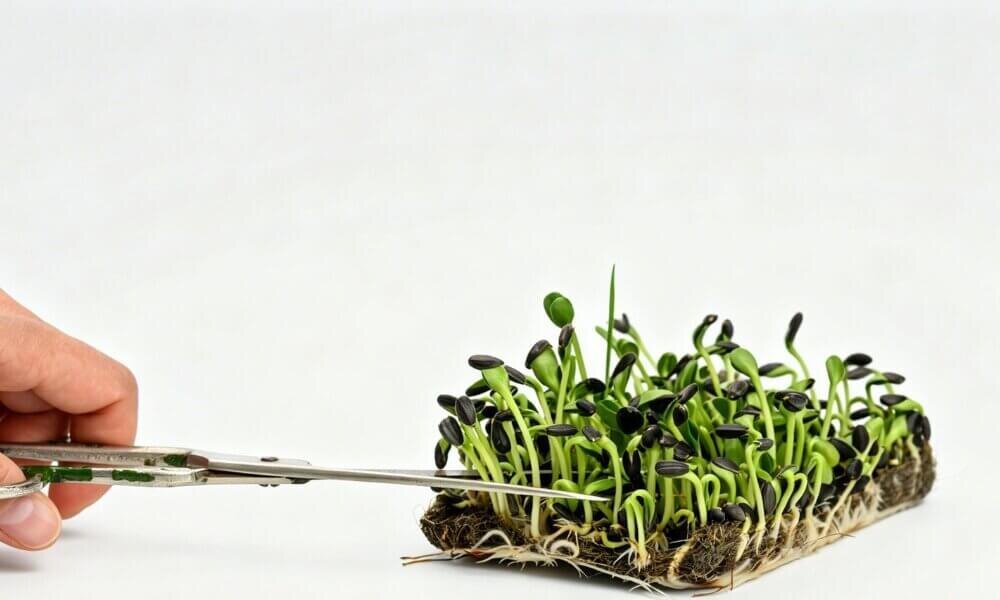
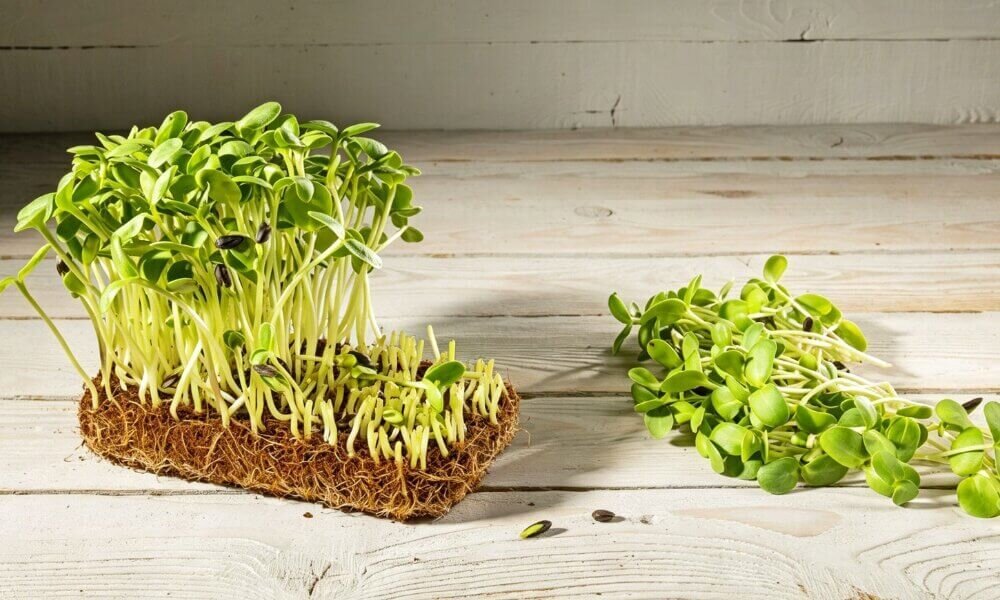
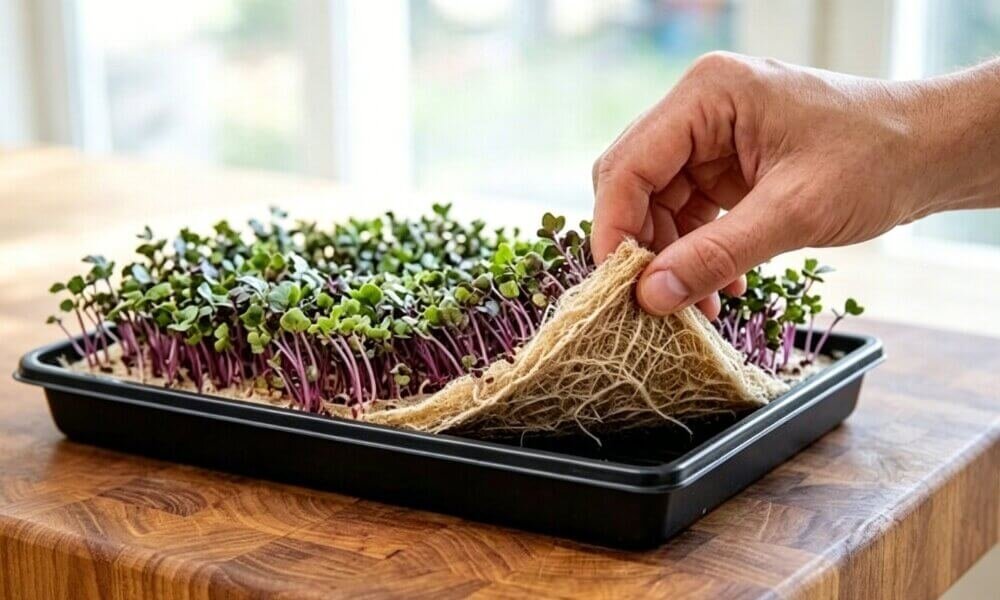
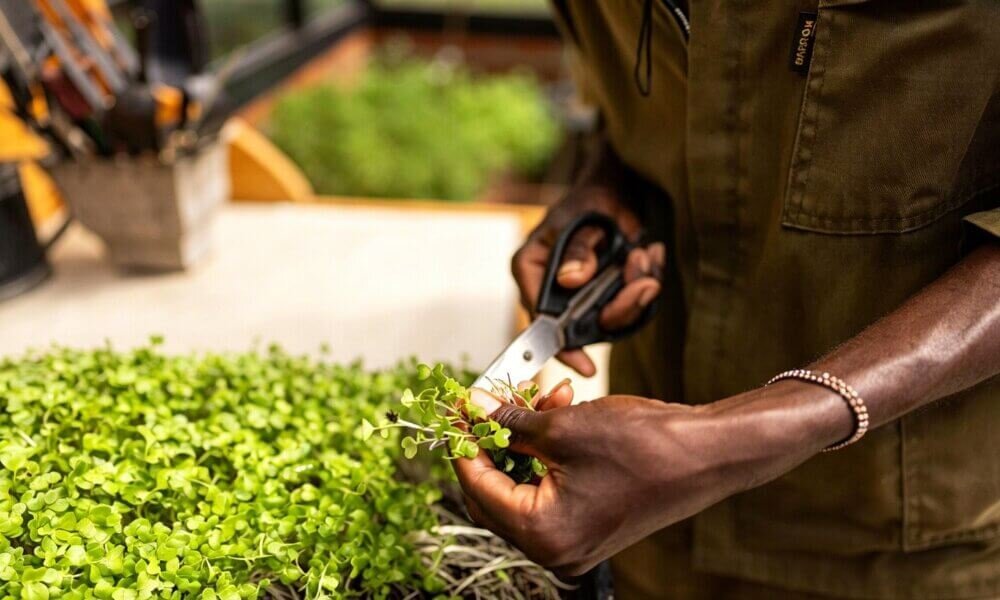
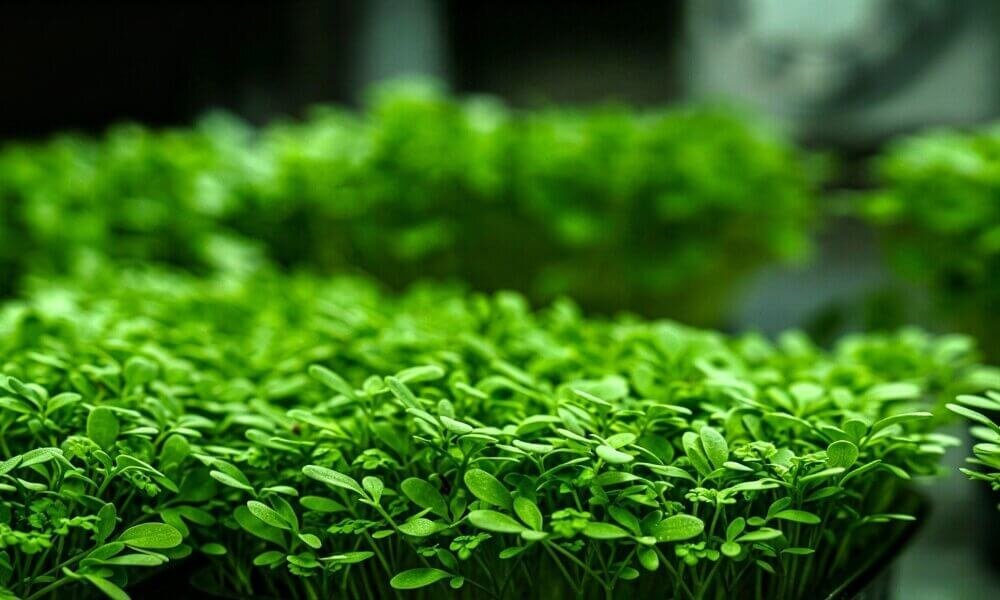
Step 8: Harvest timing decides flavor more than people realize
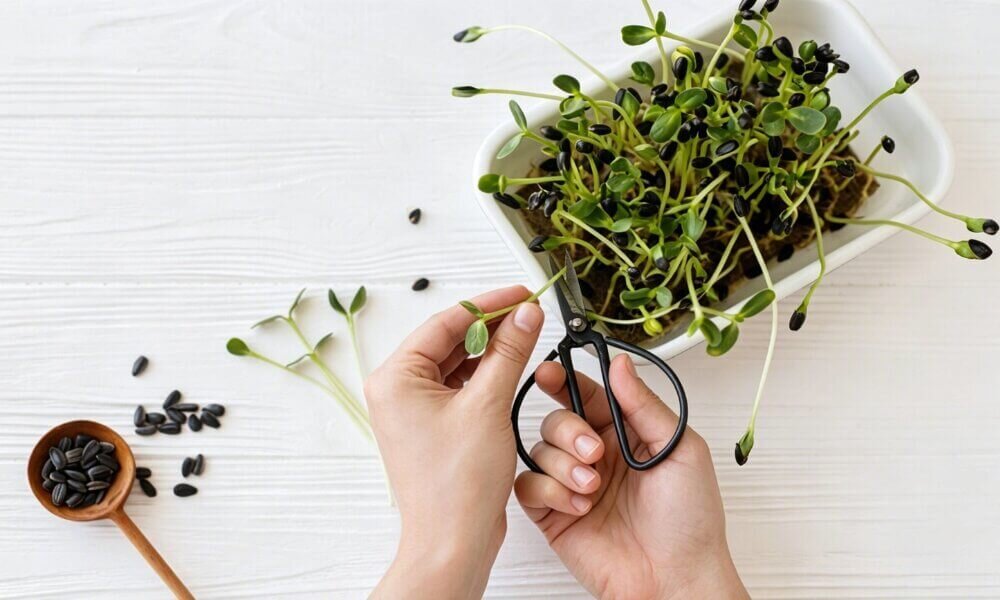
Microgreens are usually at their best when the first true leaves are fully developed, because at that stage flavor, texture, and freshness feel the most balanced.
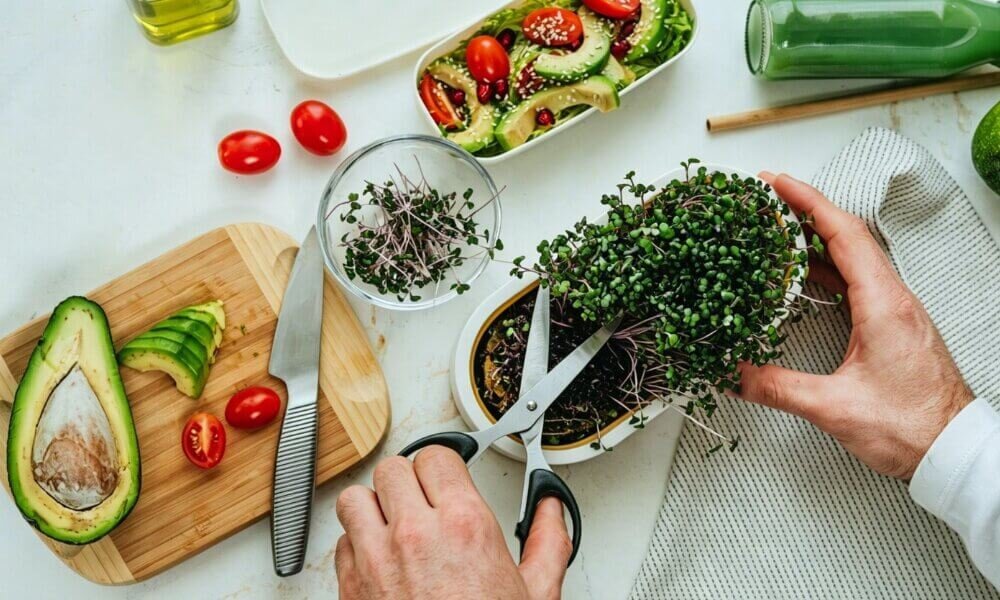
When I harvest, I always use clean, sharp scissors and cut just above the growing medium, keeping everything clean and undisturbed so the tray stays neat and the remaining structure stays healthy.
After harvesting, I move them into a cool environment quickly, because once they are cut, freshness drops faster than most people expect, and storage becomes part of the final quality. At this stage, it also helps to think about simple ways of serving them right away, and you can get practical ideas from this guide on using microgreens in meals.
Indoor Lighting Requirements for Hydroponic Microgreens Systems
Microgreens can grow in natural sunlight, but grow lights are highly recommended for consistent and high quality production, especially in indoor environments. Natural light is often unpredictable and can change with weather, season, or location, which may lead to uneven growth.
LED grow lights provide a stable and controllable light source, allowing growers to maintain ideal conditions year round. This is especially important for indoor farms, classrooms, restaurants, and home setups where sunlight may not be sufficient.
Full Spectrum LED Grow Lights for Leafy Green Production
The best LED spectrum for microgreens is typically a full spectrum light that closely mimics natural sunlight. Full spectrum LEDs provide a balanced combination of blue and red light, which supports healthy leaf development and strong stem growth.
Blue light helps promote compact and sturdy growth, while red light supports photosynthesis and overall biomass production. A balanced spectrum ensures that microgreens grow evenly, with rich color and good flavor.
Recommended Daily Lighting Schedule for Indoor Farming
Most microgreens require around 12 to 16 hours of light per day for optimal growth. This photoperiod supports strong photosynthesis while allowing a rest period for natural plant development.
Consistent daily lighting schedules are important because irregular light exposure can lead to weak or uneven growth. Using a timer with LED grow lights helps maintain a stable light cycle, especially in indoor growing systems.
Avoiding Weak Stems and Uneven Indoor Growth
One of the most common mistakes in growing microgreens is placing grow lights too far or too close to the plants. Incorrect distance can lead to weak, stretched stems or even light stress.
Another common issue is insufficient light duration. Too little light can result in pale color, slow growth, and poor flavor development. On the other hand, excessive light without proper rest periods can also stress the plants.
Finally, using low quality or non full spectrum lights may result in uneven growth and reduced yield. Choosing proper lighting equipment and maintaining a consistent schedule are key factors for successful hydroponic microgreen production.
Common Hydroponic Microgreens Problems and How to Fix Them
| Problem | Causes | Prevention and Solutions |
|---|---|---|
| Mold on Microgreens | High humidity, poor airflow, overwatering | Improve airflow with fans, reduce excess moisture, avoid overcrowding, and keep growing area clean |
| Yellow Microgreens | Lack of light, improper light distance, water imbalance | Increase LED grow light exposure, adjust light distance, and maintain balanced watering |
| Leggy Seedlings | Insufficient light intensity or poor spectrum | Use full spectrum LED grow lights, reduce distance between light and plants, and increase daily light duration |
| Poor Germination | Old or low-quality seeds, неправиль moisture levels, inconsistent watering | Use fresh high-quality seeds, maintain stable humidity, and ensure even moisture during germination |
| Root Rot and Bad Smells | Overwatering, poor airflow, contaminated growing medium | Reduce watering frequency, improve ventilation, and regularly clean trays and replace growing media when needed |
Indoor Hydroponic Systems for Home and Commercial Production
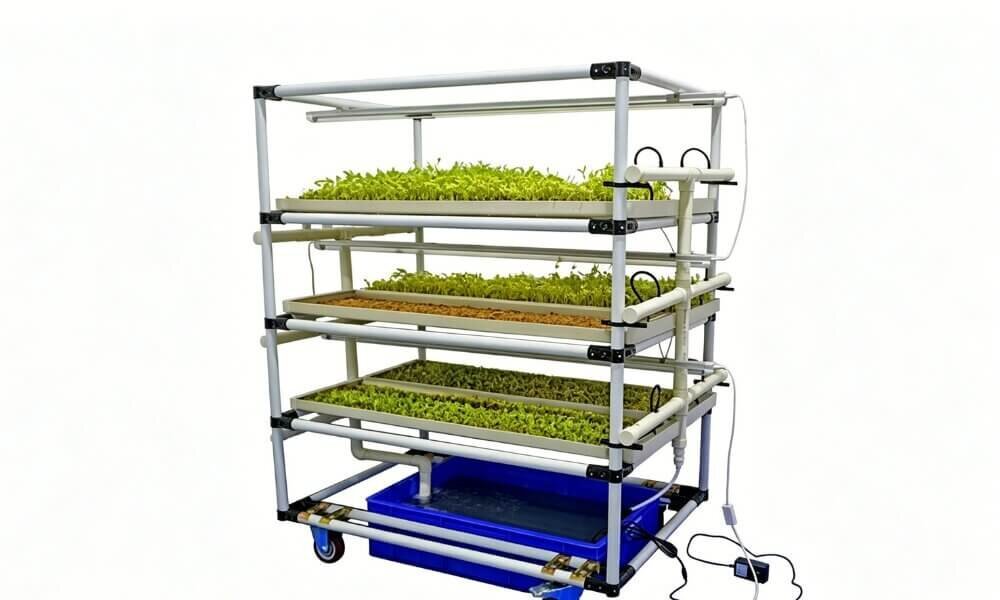
Best Small Hydroponic Systems for Beginners
Small hydroponic systems are ideal for beginners who want to start indoor growing with minimal space and simple setup. These systems are designed for home use, offering compact designs that fit easily on desktops, kitchen counters, or small indoor areas.
One of the most beginner-friendly options is the 12-hole desktop mini garden. It is perfect for growing herbs and microgreens in small spaces such as apartments, offices, and kitchens. Its compact structure makes it easy to manage, clean, and maintain, making it an excellent entry-level choice for new growers.
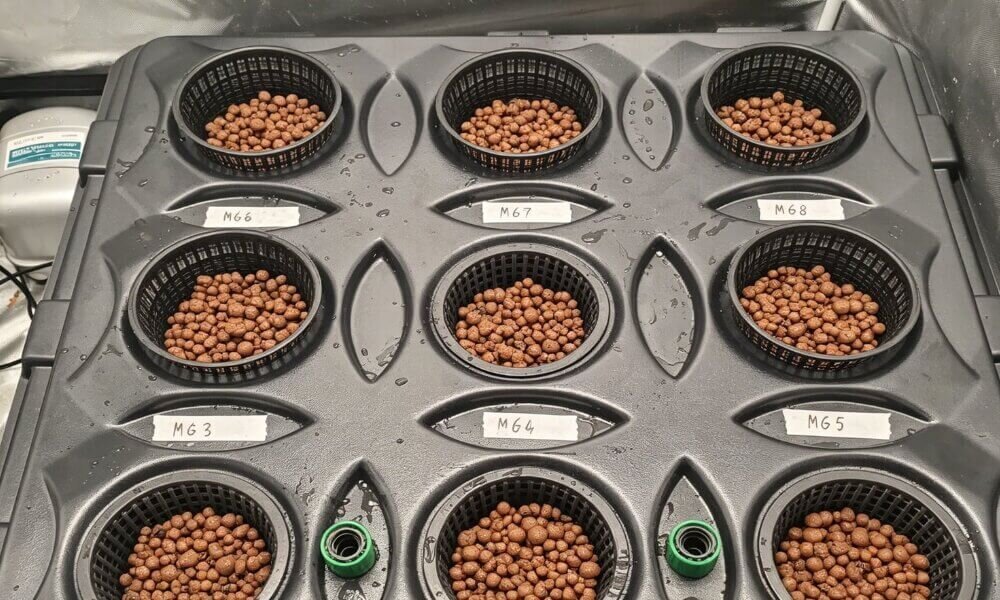
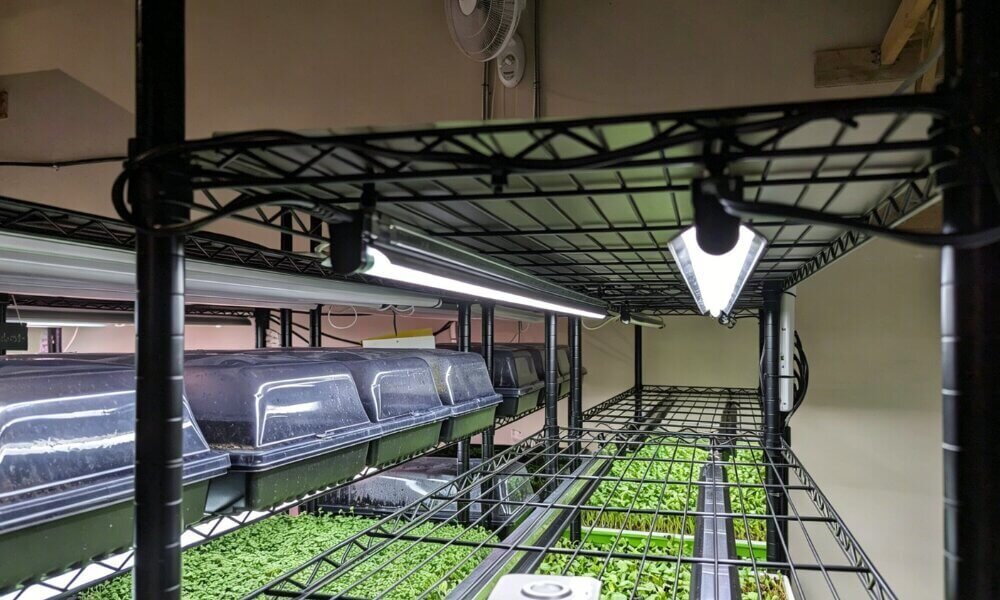
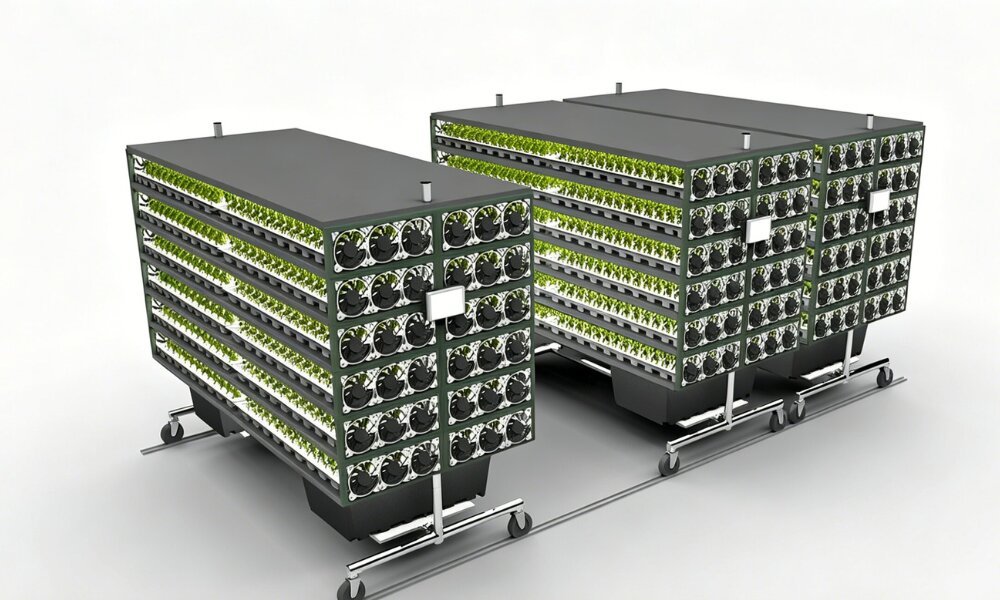
Vertical Hydroponic Towers for Commercial Production
Vertical hydroponic towers are one of the most efficient indoor growing solutions, especially for users with limited space. These systems grow plants vertically instead of horizontally, allowing significantly higher yields within a small footprint.
A 30-hole mini hydroponic tower is a popular choice for indoor growers. It can support a wide variety of leafy greens, herbs, and microgreens while maximizing space efficiency. This vertical design is especially suitable for apartments, urban homes, and small indoor farms where space saving and productivity are both important.
It is also commonly used in school projects and commercial microgreen production.
Common Questions About Hydroponic Microgreens Farming
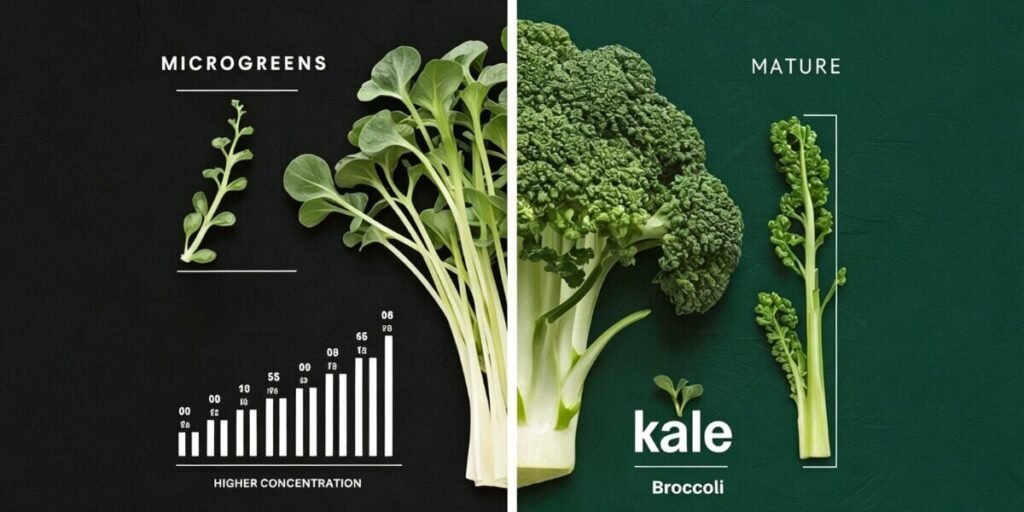
Yes, hydroponic microgreens are considered highly nutritious and are often richer in vitamins, minerals, and antioxidants compared to mature vegetables. Because they are harvested at a very young stage, they contain concentrated nutrients and are usually grown in clean, controlled indoor environments without pesticides or soil contamination. This makes them a popular choice for health-conscious consumers, restaurants, and home growers.
Most microgreens take between 7 to 14 days to grow from seed to harvest. Some fast-growing varieties such as radish or mustard can be ready in as little as 5 to 7 days, while slower varieties like pea shoots may take up to 14 days. Growth speed depends on light, temperature, and moisture conditions.
Yes, microgreens are commonly grown without soil. Instead, they are cultivated using hydroponic methods with growing media such as hemp mats, coco coir, or rockwool. These materials provide support for roots while maintaining moisture and airflow, making indoor growing cleaner and more efficient.
Radish microgreens are widely considered the easiest and fastest to grow. They germinate quickly, grow vigorously, and require minimal maintenance. Other beginner-friendly options include broccoli and pea shoots, which are also forgiving and suitable for indoor hydroponic systems.
Microgreens can grow in natural sunlight, but LED grow lights are recommended for consistent indoor production. Full spectrum LED lights provide stable lighting conditions regardless of weather or season, helping prevent weak or uneven growth. Most growers use 12 to 16 hours of light per day for best results.
Why Indoor Hydroponic Microgreens Are Growing in Popularity
Hydroponic microgreens are an easy, fast, and highly efficient way to grow fresh and nutritious vegetables at home throughout the year. They require very little space, grow quickly, and can be cultivated in a clean indoor environment without soil. With the right hydroponic system and proper LED grow lights, even beginners can achieve stable and continuous harvests.
By starting with simple setups like desktop hydroponic gardens or vertical growing towers, anyone can enjoy fresh microgreens regardless of season or location. Whether for home cooking, healthy diets, or small-scale production, hydroponic microgreens offer a practical and sustainable way to bring fresh food into everyday life.
Start Your Indoor Microgreens Farming Journey Today
If you are planning to grow hydroponic microgreens at home, in classrooms, or as part of a small indoor farming project, the most important step is choosing the right hydroponic system setup. A well-designed system ensures stable germination, healthy growth, and consistent harvest cycles, especially in indoor environments where light, water, and airflow need to be carefully controlled.
At Greenfuture Hydro, we provide complete hydroponic solutions designed for microgreens production. Our systems are suitable for home growers, schools, restaurants, and indoor farms that want to produce fresh, clean, and nutrient-rich greens all year round. Whether you are just starting with a simple tray-based setup or upgrading to a more efficient vertical or multi-layer system, we can help you choose the right solution for your growing needs.
We also offer flexible system configurations, including hydroponic trays, vertical growing towers, and compact indoor farming units. These setups are designed to make microgreens growing easier, cleaner, and more efficient, even for beginners.
Contact Us for Hydroponic Systems and Growing Solutions
If you would like to learn more about hydroponic microgreens systems or get advice on starting your own setup, feel free to contact us anytime.
📩 info@greenfuturehydro.com
📞 +86 13487543942
📷 Instagram @Greenfuturehydro
Follow us on Instagram to see real hydroponic microgreens setups, classroom projects, and indoor farming demonstrations. These real examples can help you better understand how to successfully grow microgreens in your own environment.